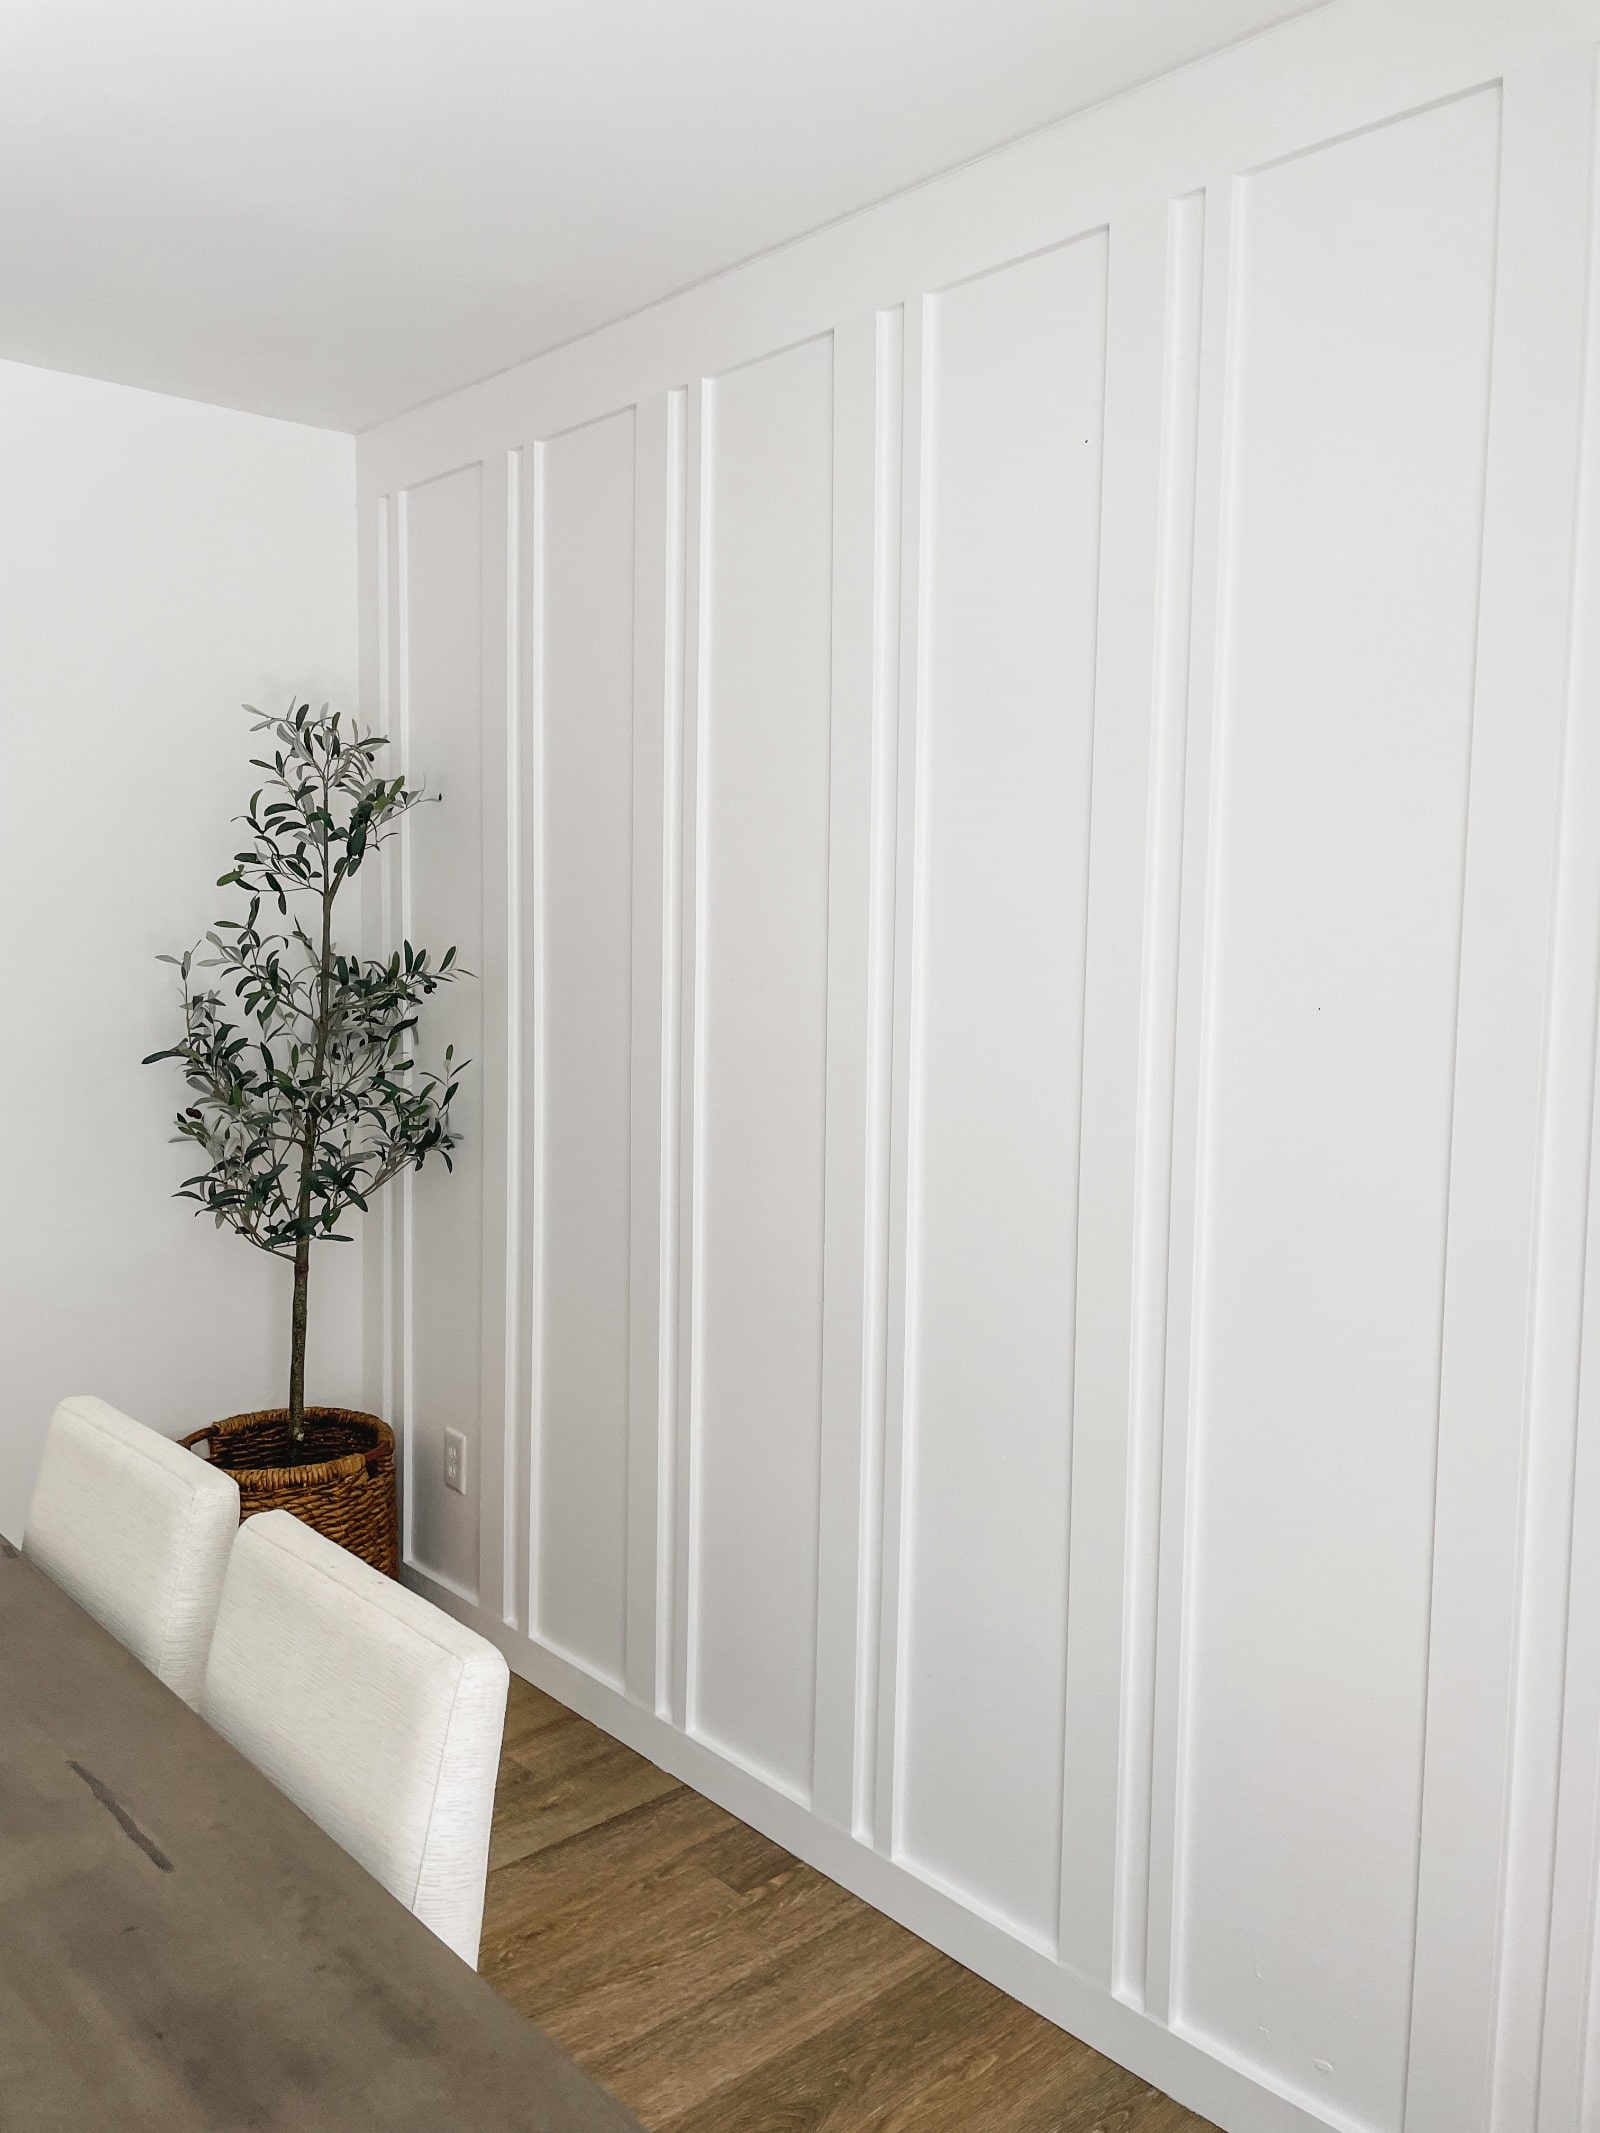
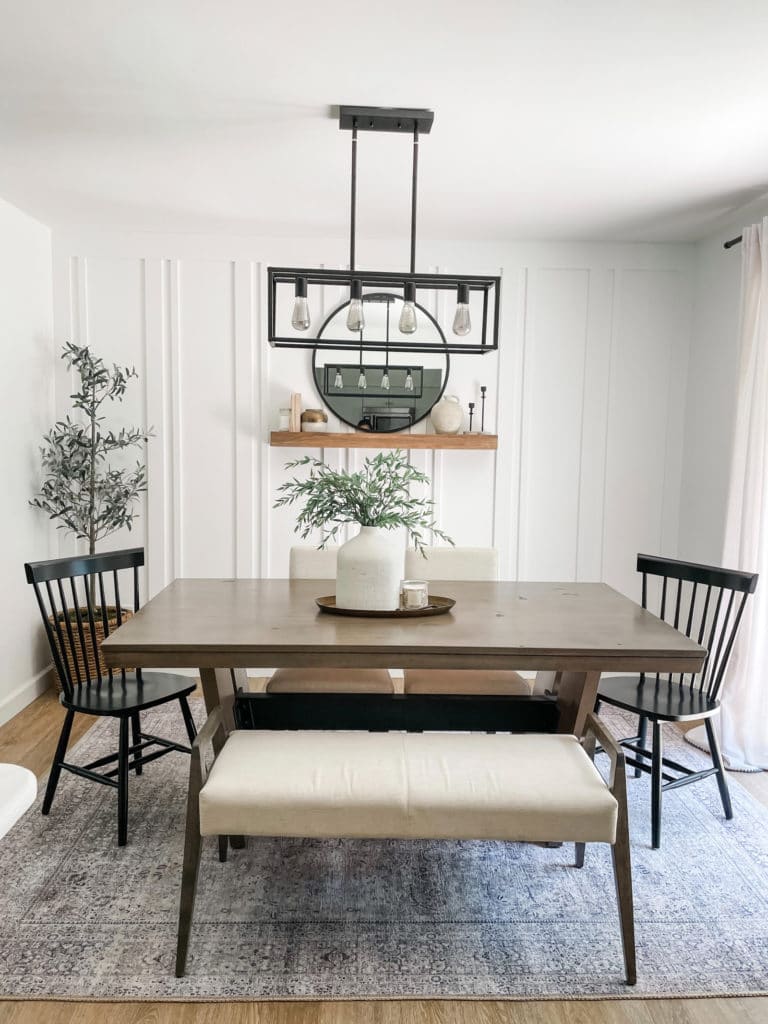
Whenever a room is looking a little plain my mind immediately goes to adding an accent wall. Anyone else? I decided it was time to give our dining a room a little refresh and thought an accent wall would be a good start.
Now I’m sure most of you have seen the traditional board & batten wall, but I wanted to add a little twist to it inspired by @lakeandlumber over on instagram.
In this post I’ll be sharing how I created a double board & batten wall that made all the difference in our dining room!
SUPPLIES/TOOLS NEEDED:
(2) 1x6x8ft primed MDF board
(10) 1x4x8ft primed MDF board
(7) 1x2x8ft primed MDF board
Level
2-inch brad nails
Caulk
Wood filler
220 grit sanding block
Stud finder
Pencil
Paint color of choice
Caulk gun
Brad nailer
SHOP SUPPLIES/TOOLS:
Important note: For reference our wall is 8x. The supplies listed above are for a wall of similar size. Amount of supplies needed may vary depending on the size of your wall/the spacing of your boards.
Step 1: Outline your wall
Begin by marking the studs in your wall. Take your 1×6 primed MDF board and horizontally line it to the edge of the upper wall. Use a brad nailer secure it onto the studs.
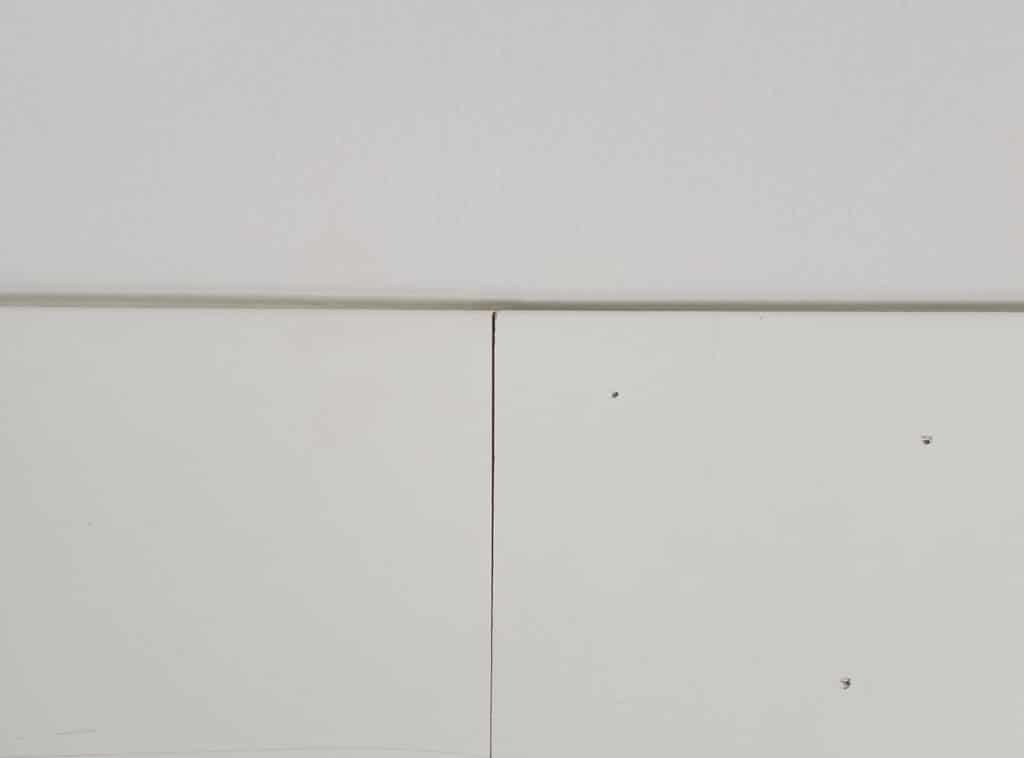
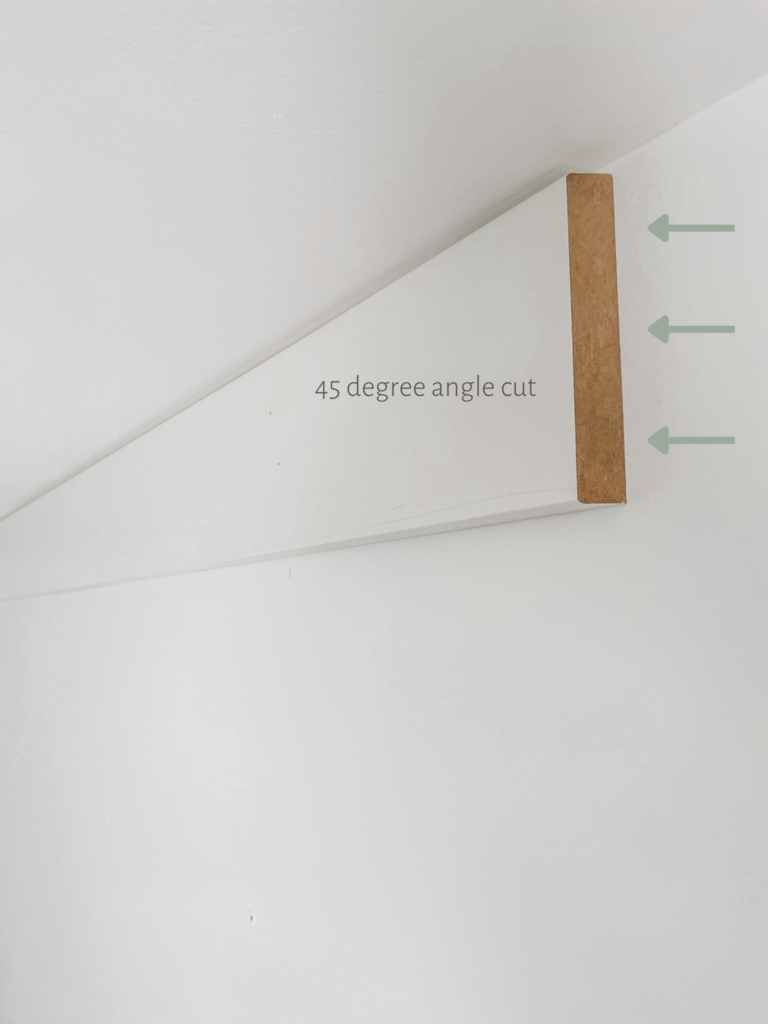
If you have to use two separate boards to meet the length of your wall (a 12ft board couldn’t fit in our vehicle) cut the end of your first board at a 45 degree angle. Cut the beginning of your second board also at a 45 degree angle. Doing so creates a less evident seam.
Two 45 degree cuts placed together
In order to give your wall a cohesive look all the way through remove the baseboard that runs along the bottom of your wall and replace it with a 1×4 MDF primed board. Again, if you need to join two separate boards together, cut at a 45 degree angle.
Cut another (2) 1×4 primed MDF boards to fit in between the top and bottom boards. Attach one to the right and one to the left side of the wall.
45 degree angle cut (bit difficult to distinguish on camera)
Step 2: Create board & batten pattern
Cut the remainder of your boards to size.
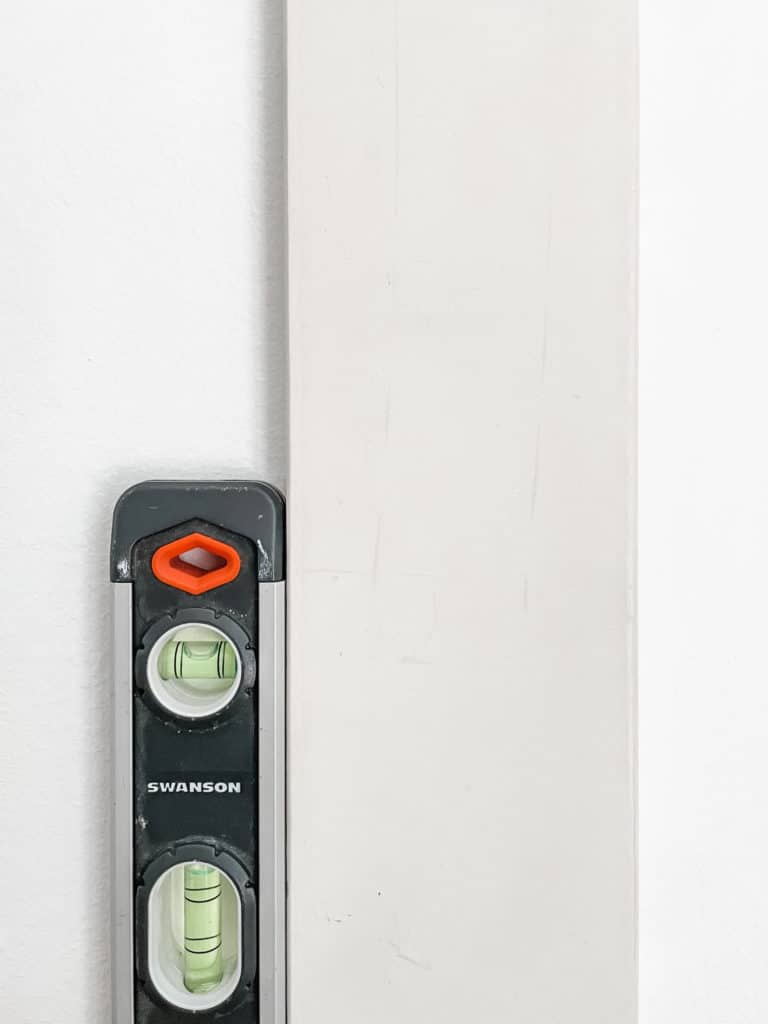
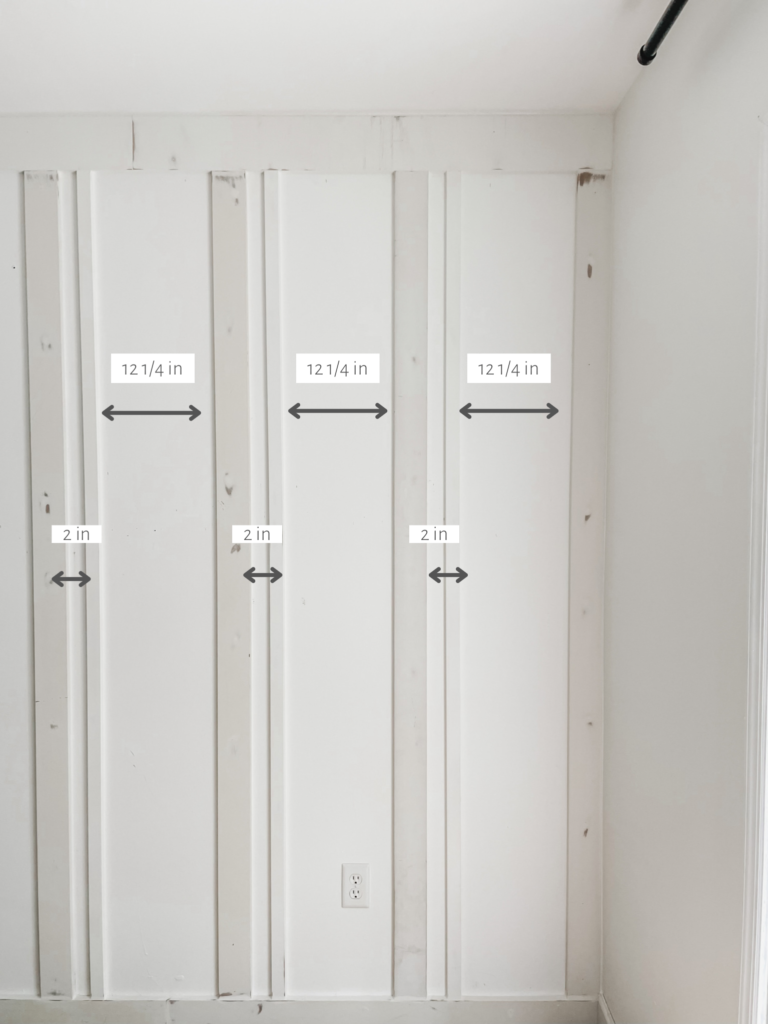
Beginning on the right side, take a 1×2 board and secure it to the wall 2 inches away from the first 1×4 board already anchored to wall. Use a level to make sure your boards are straight.
*Tip: Since these boards are attached vertically onto the wall, you most likely won’t be able to secure every one into a stud. Shoot your nail in at a slight angle rather than straight to create stronger hold.
Take a 1×4 board and secure it to the wall 12 1/4 inches apart from the previous 1×2 board.
Secure a 1×2 board 2 inches apart from the previous 1×4 board and so on.
Important note: Depending on the size of your wall you may need to adjust the spacing so your boards fits evenly.
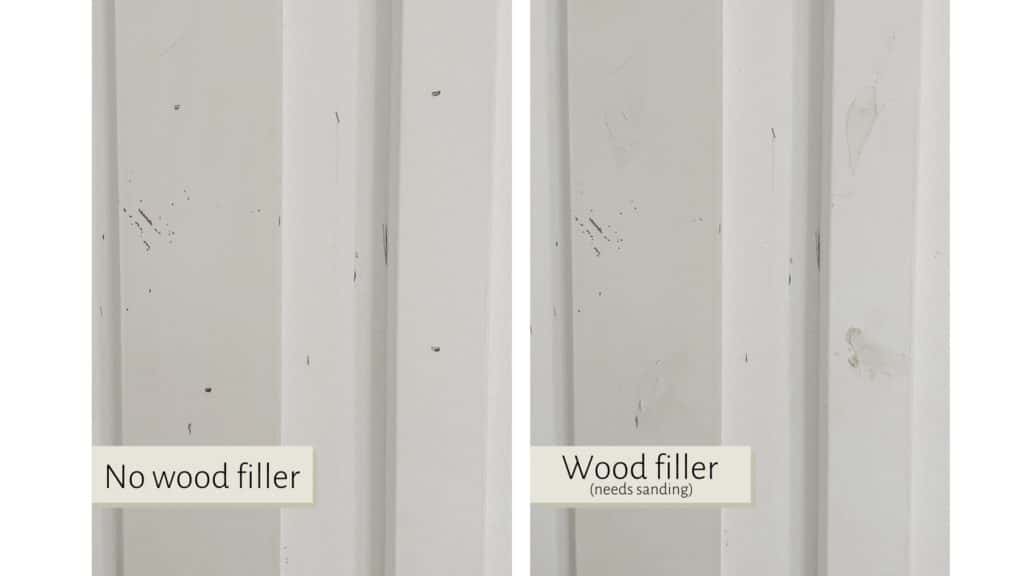
Step 3: Wood filler and sanding
Fill in any nail holes and seams between boards with wood filler. Once dry, sand down any excess with a 220 grit sanding block.
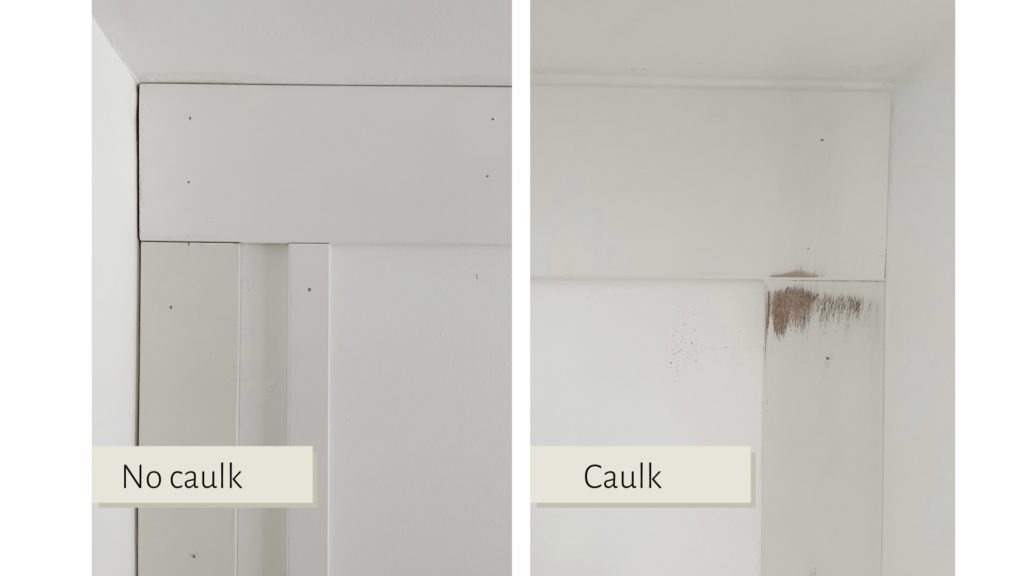
Step 4: Caulk
Caulk the areas where the board meets the wall to close in any gaps.
*Tip: Make sure you use a paintable caulk
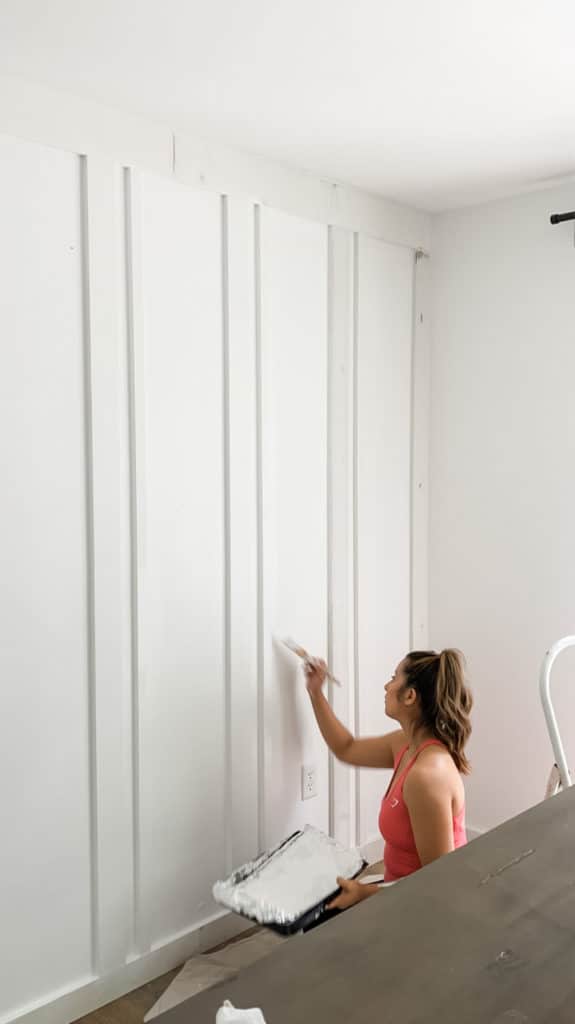
Step 5: Paint
The final step is painting! I found that a combination of both a brush and a roller worked best on this wall treatment.
And there you have it, a double board & batten accent wall in 5 easy steps! I love the spin off that it gives to a traditional board & batten wall. It’s very simple but still gives a dramatic effect in the room.
If you would like to see more of this project you can find video clips saved under a highlight titled “Double Board & Batten Wall” over on the @ourblissfulnest Instagram page. If you have any questions leave them down below. As always, if you decide to try out this DIY feel free to tag @ourblissfulnest on your Instagram posts or send a picture via DM or email. I would love to see how it turns out!
Disclaimer: This post contains links in which I do earn a small commission from if you decide to purchase through them. This comes at no additional cost to you and as always your support is greatly appreciated!
I love your wall and would love to do it as an accent wall in my bedroom. I was wondering if the wall needs to be sanded before you begin the project, since my wall is textured.
Thank you,
Sandra
Honestly I’m not sure since I do not have textured walls. I have seen people put hardboard on their walls when doing a half accent wall so it’s smooth all the way throughout, but I think that would be a lot if you plan to do an entire wall.. you can always try sanding a small area of the wall to help you decide what direction to go in.

The Comments
Sandra Horn
I love your wall and would love to do it as an accent wall in my bedroom. I was wondering if the wall needs to be sanded before you begin the project, since my wall is textured.
Thank you,
Sandra
Erika
> Sandra HornHi Sandra,
Honestly I’m not sure since I do not have textured walls. I have seen people put hardboard on their walls when doing a half accent wall so it’s smooth all the way throughout, but I think that would be a lot if you plan to do an entire wall.. you can always try sanding a small area of the wall to help you decide what direction to go in.