Ourblissfulnest

Mudroom Closet Makeover
DIY

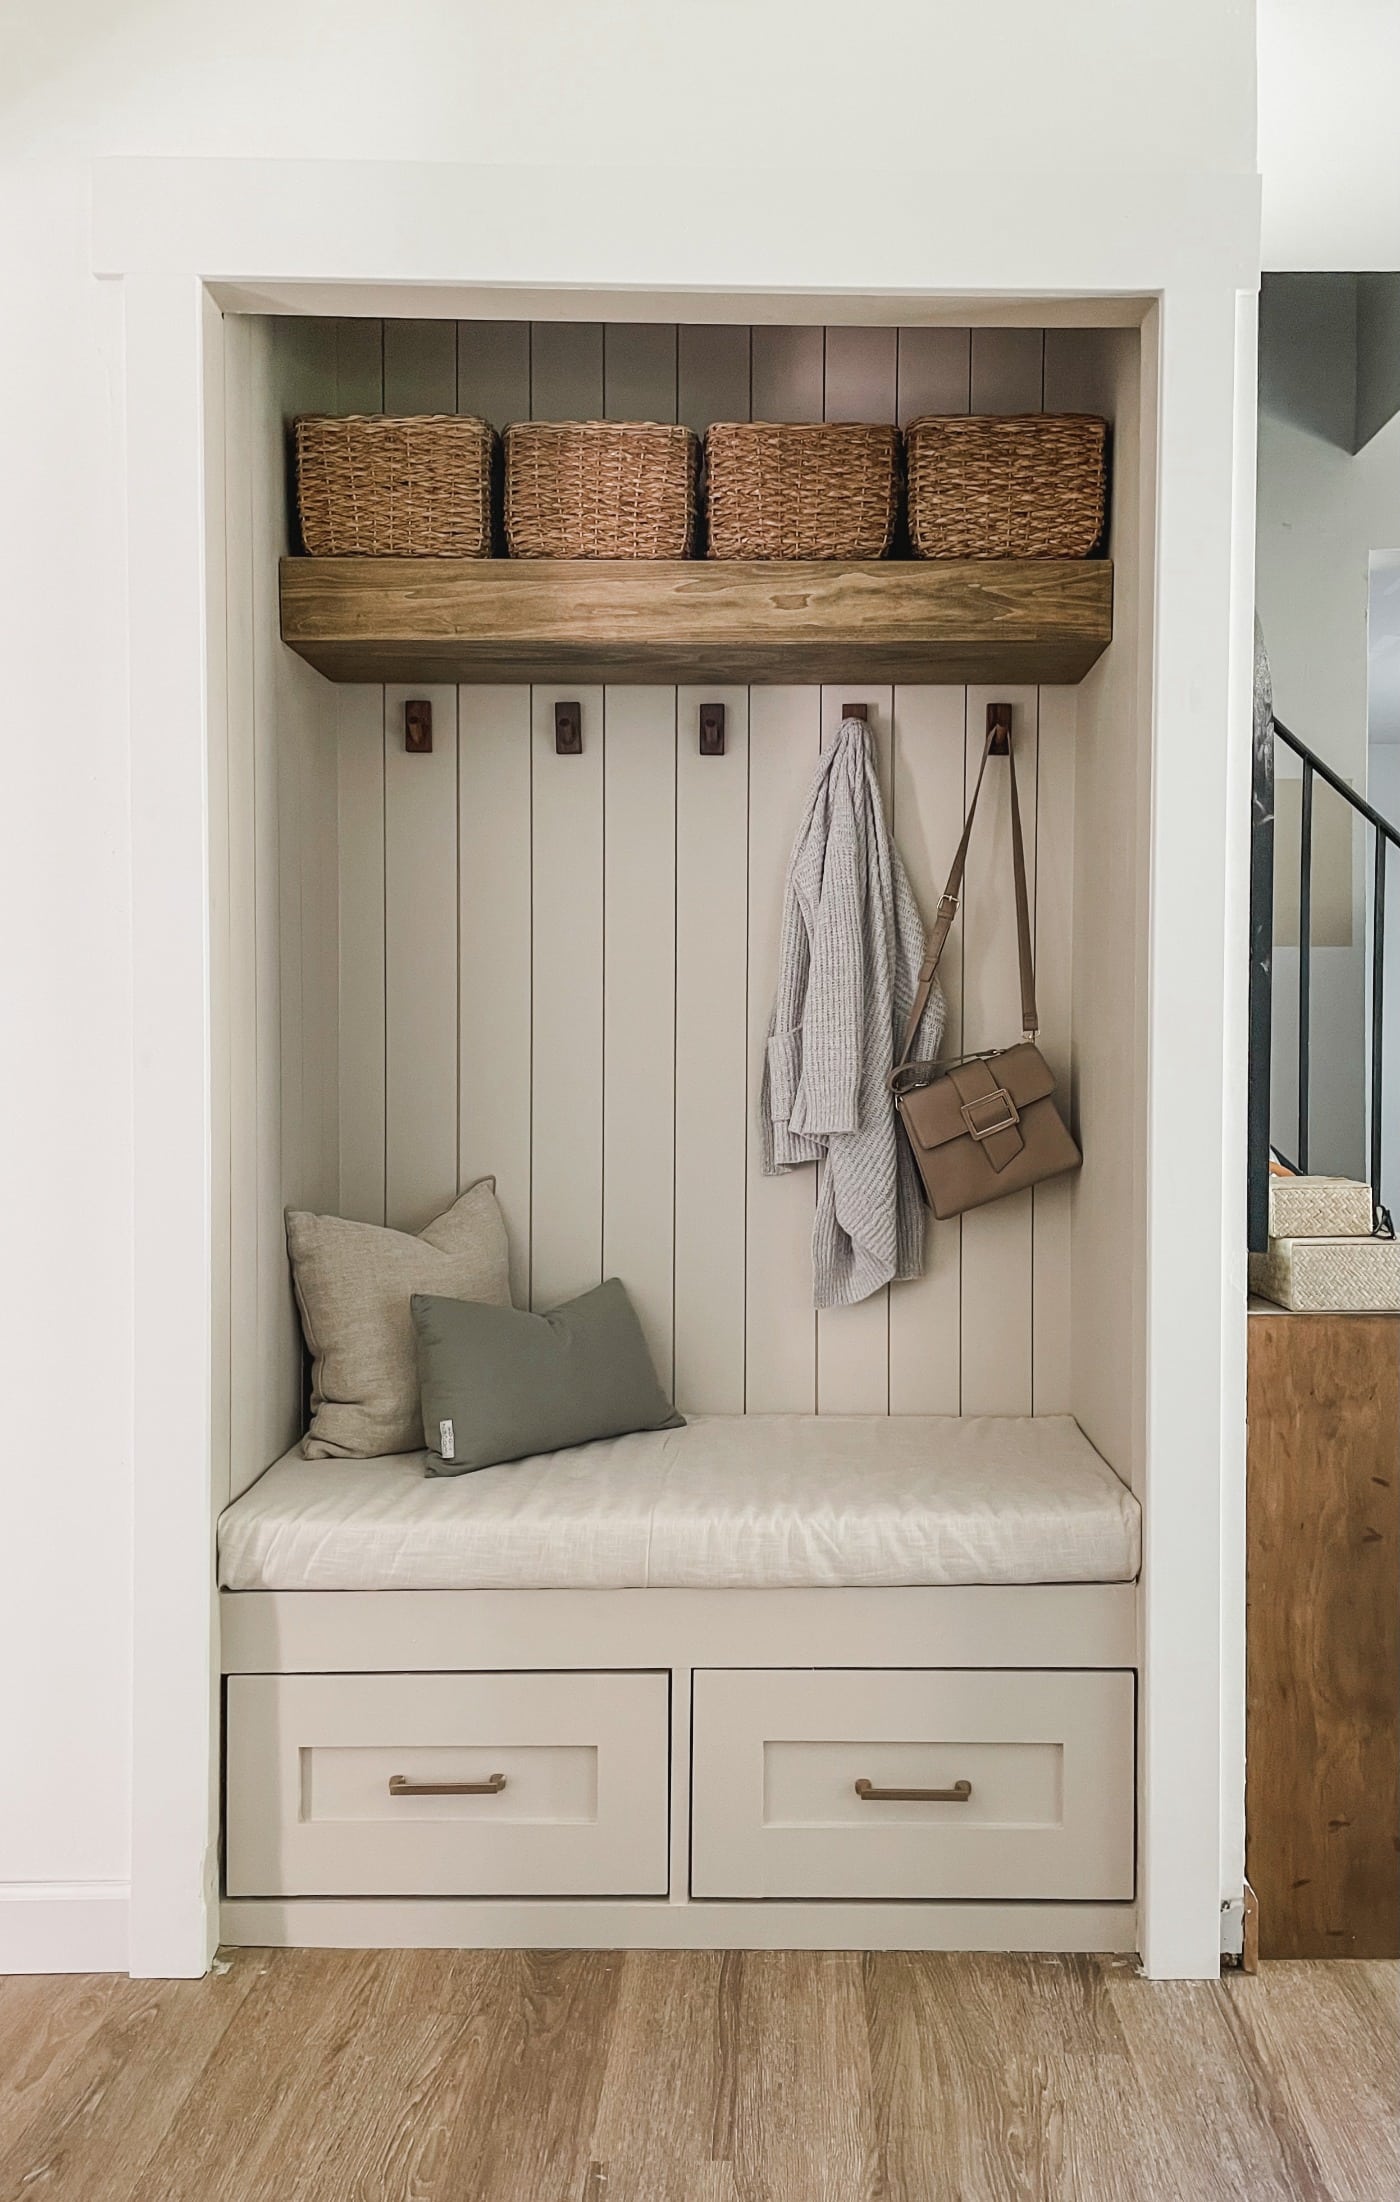
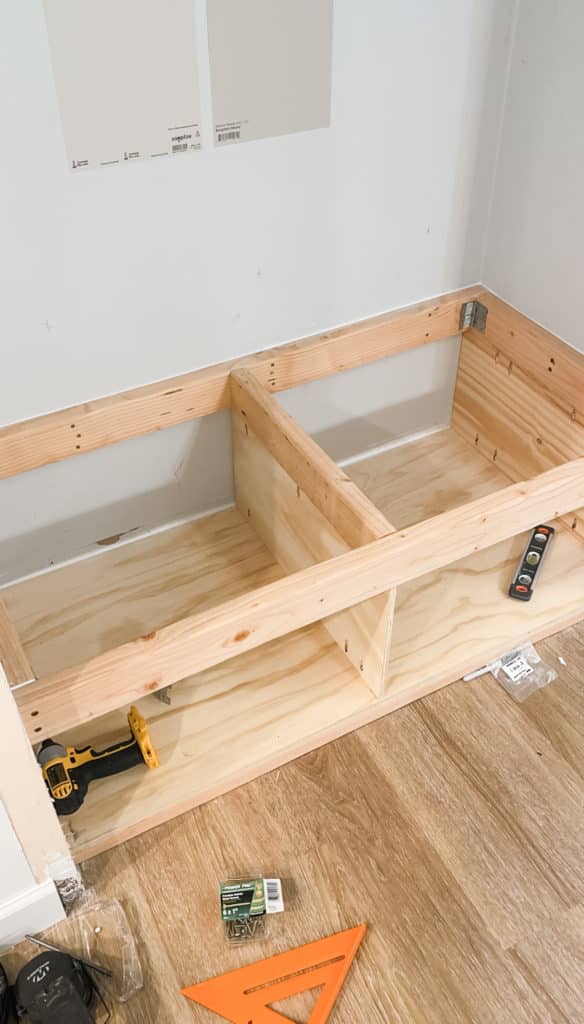
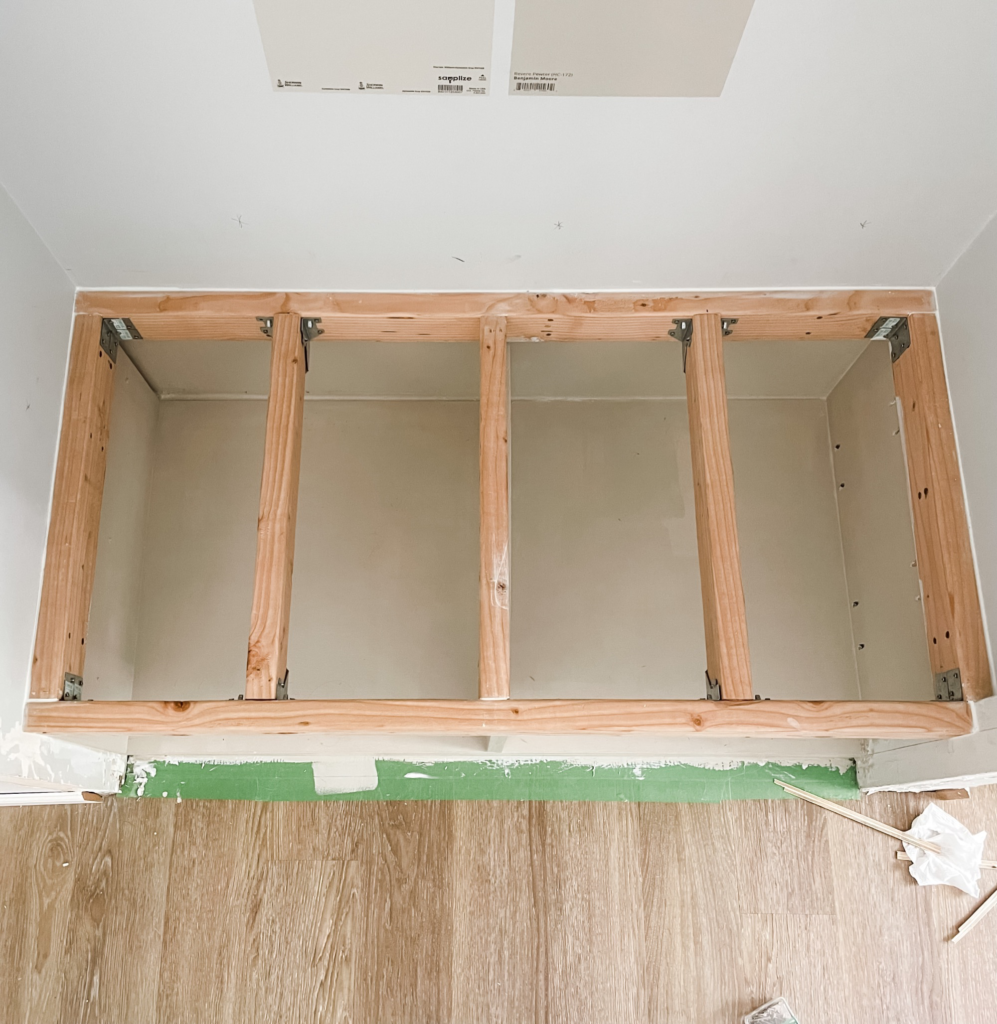
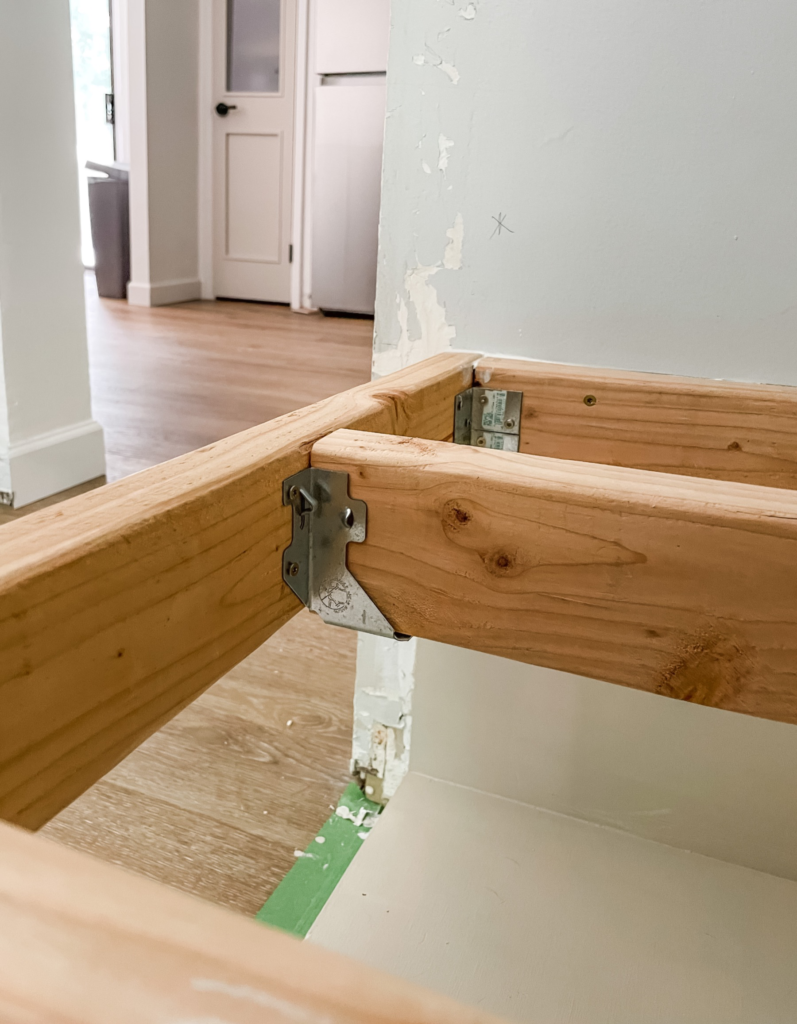
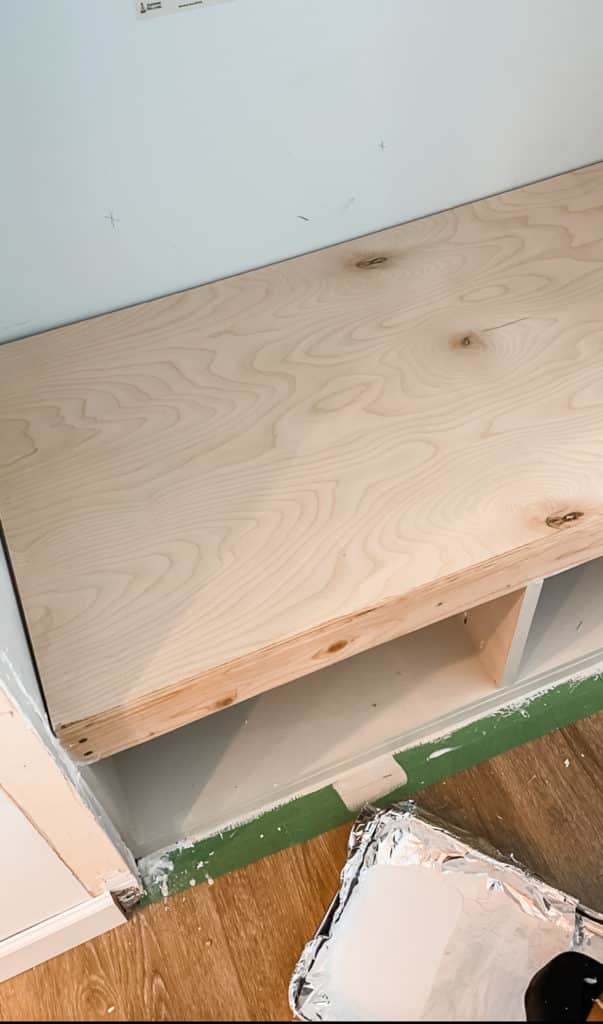
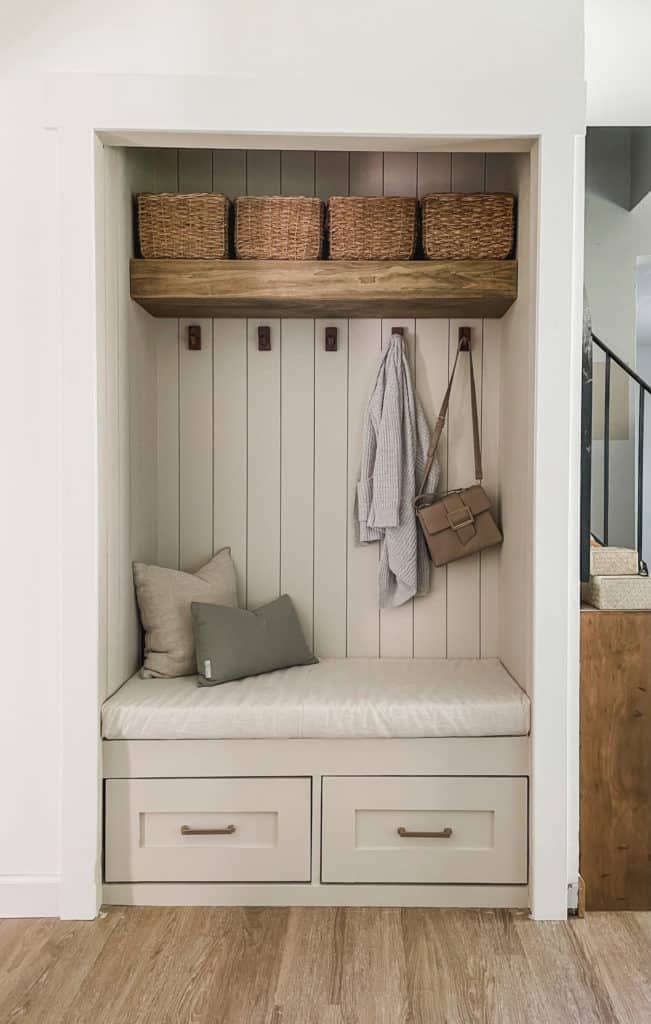
DIY Mudroom Closet Makeover

Mudroom Closet Makeover

As someone who is a fan of an open concept I bet you can imagine how I felt being greeted by a closed off entryway every time I walked through the door. 

Can an entryway closet be functional? Absolutely. However, this closet had no organization system whatsoever which in turn led to a constant piled-up mess.

In this post I’ll be sharing how I transformed our entryway closet into a much more functional and beautiful mudroom storage area. 

Entryway Closet Before
Entryway closet "before" image

For the drawer bench: 

  • (4) 2×4 8ft pine boards
  • (2) 3/4in. 2x4ft plywood sheets
  • (2) 1/4in. 2x2ft plywood sheet
  • (3) 1/4x4in. 4ft poplar boards
  • (2) 1/2in. 2x4ft plywood sheets
  • (4) “L”- shaped brackets
  • (6) Joist hangers
  • Wood screws for brackets/joist hangers
  • 2 1/2 in. coarse Kreg screws
  • Drawer slides
  • Wood glue
  • Caulk
  • Primer
  • Paint color of choice
  • Speed square
  • Level
  • Measuring tape
  • Kreg Jig
  • Drill  
  • Miter saw  

SHOP MATERIALS/TOOLS HERE:

For upper shelf:

  • (2) 1x4in. 8ft pine board
  • (1) 1x12in. 4ft pine board
  • (2) 1/4in. 4ft poplar boards
  • Surface mount soft-close hinge
  • Wood screws
  • Wood stain of choice
  • Measuring tape
  • Clamps 
  • Drill
  • Miter saw

SHOP MATERIAlS/TOOLS HERE:

Clean Out & Demo

I began by cleaning out the closet and removing any baseboards, support cleats, shelves, rods, etc. I filled in any holes with spackle and sanded them down smooth once they were dry.

Entryway Closet Empty
Entryway closet after everything had been removed

Built-in Storage Bench

To maximize the functionality of this space I decided to add a storage bench. You can go about this several different ways. You can either purchase one (I was considering the BESTA Ikea TV unit ) or you can custom build one, which is what I decided to do.

1. Bench Support System

In order to support the weight of the bench you’ll need to create a base for it. To do this outline the bottom of your closet with 2×4’s. Add additional 2×4’s in the middle for extra support. My bench was 4ft in length so I used two support beams in the middle. However, if your bench is longer I would recommend adding additional support beams for durability. 

Entryway Closet Bench Base
Supporting base for the bench made out of 2x4's

To connect your 2×4’s together use pocket holes. Drill pocket holes onto both ends of your vertical 2×4’s and use 2 1/2 inch coarse-thread Kreg screws to connect them to the horizontal 2×4’s. If you’re not familiar with pocket holes this video is helpful in explaining the general concept.  

Pocket holes on both ends of the middle 2x4's

IMPORTANT NOTE: Make sure all of your vertical beams are perpendicular to your horizontal 2×4’s prior to attaching them. You can use a level and a speed square to double check for accuracy. 

Once all 2×4’s have been secured in place, take a 3/4 inch sheet of birch plywood and place it over the 2×4’s. You may have to trim your plywood down depending on the size of your bench

Secure the plywood with brad nails or screws onto to the 2×4’s.

Entryway Closet Finished Base
Supporting base complete with plywood sheet over the 2x4's

Determine where you want the support system to sit for the upper portion of your bench. To do this I measured each wall to my desired height and drew a line to connect the walls together (a laser level would be ideal for this step). 

Keep in mind that this will not be the final height of your bench. There will be an additional 3/4 inch height from the plywood sheet that will sit on top of the support system plus the height of the cushion that you will be using.

Measure and cut your 2×4 boards to size. Use a stud finder to mark where the studs in your closet are located. You will want to drill your 2×4’s into these studs so that they are well anchored onto the wall. 

To give the bench extra support I used “L” brackets on each of the inner corners.

Entryway Closet L Brackets
Frame of upper bench support

Before adding the middle support beams of the upper portion of the bench I would suggest working on the inside dividers of your bench so that you have more room to work in.

Determine how many drawers you want to place within your bench.

I decided on two drawers which meant I needed 3 dividers. I used 1/2 inch plywood sheets for the dividers and cut them to size. 

For the two end dividers I simply screwed them onto the wall and used pocket holes to connect them to the upper and lower support beams.

End divider attached to upper and lower bench support system using pocket holes

*IMPORTANT NOTE: Make sure you are constantly checking with a speed square to make sure that everything is perpendicular to each other 

Notice the gap in the left image on the long side of the speed square

Determine where your middle divider needs to go and attach a 2×4 support beam right above it. This will be necessary to attach the divider to. Once again, use pocket holes to attach the divider to the upper and lower support systems of your bench. 

Entryway Closet Support System
Middle divider installed

In addition to the middle support beam already attached, I added an additional two 2×4 beams. I attached these using joist hangers for support. Pocket holes would work as well but I found that using the joist hangers was a bit easier.

Use two joist hangers per 2×4 placing one on each end of the beam. Attach one end to the front and one end to the back beam of the bench.

Entryway Closet Support Beams
Joist hangers to support middle beams
Entryway Closet Joist Hanger
Middle beams sit within joist hanger

Place a 3/4 inch birch plywood sheet over the support system and use brad nails or screws to connect the two together. Caulk the edges for a seamless look. 

Entryway Closet Upper Bench Finished
Upper bench support system complete with birch plywood sheet (caulking still needs to be done)

*IMPORTANT NOTE: You may have to use a jigsaw or a multi-tool to make specific cuts in order for your plywood sheet to fit. 

2. Front-Facing Frame Work

To hide where the 2×4’s and plywood sheets meet together I used 1×5 poplar boards that were 1/4 inch thick (I did have to trim the width down a little on my table saw).

I attached those onto the front frame of the bench using wood glue and 1 inch brad nails.

I filled in the nail holes from the brad nailer with wood filler and once they were dry, I sanded them down and painted.

Front frame work
Poplar board placed to cover unfinished plywood edge

3. Drawers

For the drawers I decided to use 3/4 inch plywood. I recommend using a 4x8ft sheet. You can either cut the pieces down to size yourself, or you can have them cut a your local Lowe’s or Home Depot.

Drawer Slides

Begin by selecting your drawer slides. This will be helpful in determining what size your drawer box will need to be.

I decided on side mount drawer slides as they seemed like the easiest to use. 

Keep in mind that side mount drawer slides are sold in increments of two inches (18in. , 20in. , 22in. , etc.)  To determine what size drawer slide you’ll need, measure the depth of your box opening. If your measurement falls on an odd number round down to the nearest second. 

Example: If the depth of your box opening is 25in., you would round down and use a 24in. drawer slide. 

Box Measurements

Height

Measure the opening of your box from top to bottom. I like to measure on the left side, middle, and right side of the opening to make sure that they are all the same measurement. If for some reason you find that they are not the same number, I would go with the smallest measurement (although they should all be relatively close if your opening is square). Take that number and subtract 1 inch for clearance of the drawer. 

Height drawer measurement
Drawer height

Take your plywood sheet and cut it down into individual strips using your height measurement. 

Example: My frame opening measured 12 inches in height, so the height for my drawers will be 11 inches. I took my plywood sheet and cut it into (4) 11inch pieces.

Width

Measure the opening of your box from left to right. I like to take a measurement at the top, middle, and bottom of the box opening to make sure that it’s even. If for some reason you find that they are not all the same number, I would go with the smallest measurement (although they should all be relatively close if your opening is square).

This is where you need to take your drawer slide thickness into consideration. If you are using side mounting drawer slides, chances are that they are 1/2 in. thick each (you can double check on the packaging). If this is the case, you need to subtract 1 inch from your overall width measurement.

1/2 inch left drawer slide + 1/2 inch right drawer slide = 1 inch all together.

Example: My drawer width was 22 1/2 inches. Once I took the thickness from both slides into account, my width measurement came down to 21 1/2 inches. 

Drawer width

Next you need to take your plywood thickness into account. Here’s a simple way to subtract the plywood thickness without having to do any math:

Take two small scrap pieces of plywood and place them up against the left side of the plywood that you have already cut down for your drawer box. Take your tape measure and line it up at the beginning of your two scrap pieces. Mark the width measurement of your drawer box. This is where you will make your cut. 

Width Drawer Measurement II
Easy hack to get the width of your drawer

Repeat this process for all of your width pieces (2 per drawer). These will be your front and back pieces of the drawer. 

Depth

The right and left sides of your drawer box will be your depth pieces. These are the easiest measurement as you just have to cut them down to the same length as your drawer slide. 

Depth Drawer Measurement
Drawer depth

Example: The drawer slides that I used were 22 inches so the right and left plywood sheets were cut to 22 inches. 

Drawer Assembly

There are plenty of ways to assemble drawers but I found the pocket hole method to be the easiest. I suggest labeling your pieces “front”, “back”, “left” and “right” to avoid any confusion.

Drill your pocket holes on the front and back plywood sheets of your drawers. You want the pocket holes on these boards because no one will ever see them- your front pocket holes will be covered by the drawer front and the back side of your drawer will most likely be up against a wall.

Drill three pocket holes on both the left and right sides of your front and back drawer pieces. When forming the drawer box make sure that the pocket holes are facing the outside of the box.

Carefully start assembling your drawers using clamps to hold into place. Take a speed square and make sure all corners are perpendicular before you drill your screws in. I used 3/4 inch coarse-thread Kreg screws.

Entryway closet makeover 1
Pocket holes on front side of drawer

For the bottom of the drawer I simply cut a 1/4 inch sheet of plywood to size and I attached it using wood glue and brad nails. 

Entryway closet makeover 15
1/4in. plywood sheet on bottom of drawer box (box is upside down in picture)

Drawer Front

For the drawer fronts I chose to go with a simple shaker style. You can either use left over plywood and cut it to size for your drawer fronts or you can use pine boards instead.

IMPORTANT NOTE: The drawers for this specific project have inset drawer fronts (they are not overlay). The method you use to measure for overlay fronts will be different than the method that I used. 

Since my drawer height was around 12 inches, I decided to use a 1×12 inch pine board for the actual drawer front. For the stiles and rails of the door I used 1×2 inch pine boards.

Entryway closet makeover
1x2 pine boards used for stiles and rails of drawer front

While using a router would be the more “professional” method in assembling your drawer fronts, I wanted to keep things super simple. 

Once my stiles and rails were cut to size I simply attached them with wood glue and brad nails. 

I used wood filler where the stiles and rails met and I caulked the inner seams for a continuous look.

I proceeded to prime and paint the drawer fronts as the final step. 


Attaching the drawer fronts

Painted drawer fronts

Attaching the Drawer Front

To attach the drawer front, I placed a 1/4 inch sheet of plywood directly in front of the drawer box and placed the drawer front directly on top. By doing so it ensured that the drawer front lined up with the bottom of the drawer face (not including the 1/4 inch piece- I used that as my clearance for the bottom of the drawer). 

1/4in. plywood sheet used as a spacer for drawer front before drilling

To prevent any splitting of the wood, you’ll want to drill pilot holes before drilling your screws in. Drill pilot holes into the drawer box first, and use those as a guide to continue to drill pilot holes into the drawer front. I drilled 4 pilot holes total- one in each corner of the drawer front. 

Drill your cabinet screws in. Make sure you choose ones that are long enough to go through both the drawer box and the drawer front.


Drawer Slide Installation

For the drawer slide installation, I took a 2×4 and cut it to the same length as my drawer slide. I placed it directly underneath where the drawer slide will go. By doing so, the 2×4 did all the work of holding the slide in place while I drilled the screws in. Using this method also ensured that my slide was level all the way through. 


Entryway closet makeover 1
Using a 2x4 to help install drawer slides

I found that it was the easiest to install the drawer slide to the drawer box once it was already in place. That way there was no guessing game as to where I should drill it. 

Attaching drawer slide to drawer box

*IMPORTANT NOTE: If you have not installed the drawer hardware yet, add a long piece of tape to the backside of the drawer and wrap it through the top so you are able to easily open/close the drawer when adjusting the drawer slides.

Drawer Hardware Installation

Since these drawers were built from scratch I had to  to drill holes for hardware as well. I decided on champagne gold pulls for each drawer.

A trick for hardware installation that I like to use is placing painter’s tape on the backside of the hardware. Use a small drill bit to create a hole where your screws will go.

Tape hack to drill hardware pilot holes

Remove the tape from the pull and place it on the center of your drawer. Use a level to make sure that it is straight.  This will serve as a guide for knowing exactly where you need to drill your holes. 

Drill holes and secure hardware.

Shiplap

To create more visual interest within the space I decided to add shiplap within the walls of the closet.

If you have never worked with shiplap before or are just looking for additional tips be sure to check out “How to Create a DIY Shiplap Wall in 8 Easy Steps” for an in-depth tutorial. 

Entryway closet makeover 10

Shelf

For the upper shelf I started out by staining all of the wood that I would be using. Once it was dry I took the 1×4’s and drilled them into the studs of the wall to act as supporting cleats for the shelf.

Entryway closet makeover 11
Support cleats for shelf

For the the top of the shelf I simply placed a 1x12in. 4ft poplar board above the 1×4’s. You can attach it to the 1x’4’s using a brad nailer or screws if you wish, but I didn’t find it necessary. I personally like having the option to easily remove it if needed to be.

For the bottom of the shelf I used a 1/4 inch poplar board and used my brad nailer to secure it onto the 1×4 cleats.  

Entryway closet makeover 7
Clamps used to hold boards in place when assembling

Hidden Shelf Compartment

For the face of the frame you’ll need another 1/4 inch poplar board. 

Since my main priority was to create a functional space, I decided to add a hidden compartment to the shelf. This gives us additional space where we could store extra items.

We installed a soft-close surface mount hinge onto the 1×12 (bottom side) and front-facing 1×4 from the inside so that the hinge wouldn’t be visible when closed.

Hidden Shelf Hinge
Side view of surface mount hinge
Hidden Shelf Hinge II

IMPORTANT NOTE: While there is plenty of space to store items in this hidden shelf compartment, we are a bit limited due to the fact that we installed a 1/4 inch board as the bottom piece of the shelf. Since it is so light and thin I wouldn’t suggest storing anything heavy inside.

If you would like to store heavier items I would suggest using a 1/2 – 1 inch thick board. In addition I would suggest using screws to secure your board onto the cleats rather than using brad nails.

Mudroom Closet Makeover
Entryway closet "after" picture

What I thought would be a two week project quickly turned into a 6 week project, but I must say that it was SO worth it! 

I couldn’t be happier with how this entryway closet makeover turned out! Our entryway feels so much more open and I love that I didn’t have to sacrifice functionality for a more pleasing appearance.

If you would like to see more of this project you can find video clips saved under my IG highlights titled “Entryway Closet” and “DIY Drawer” over on the @ourblissfulnest Instagram page.

If you have any questions leave them down below. As always, if you decide to try out this DIY feel free to tag @ourblissfulnest on your Instagram posts or send a picture via DM or email. I would love to see how it turns out! 

Leave a Comment

The Comments

  • Jentry
    November 1, 2023

    Hi, what paint color did you use? I don’t see it in the article. Thank you.

  • Lauren
    February 8, 2024

    This looks amazing! What color paint is this?