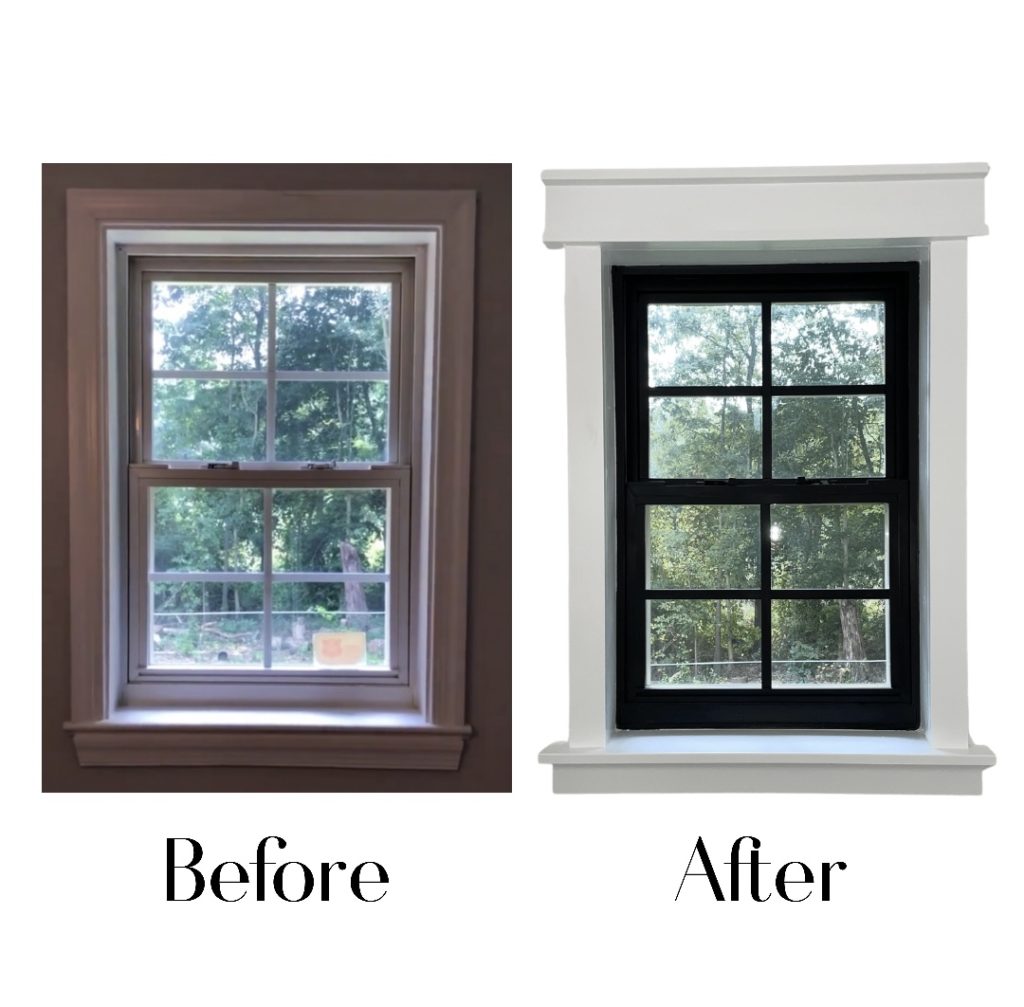
DIY Black Window Frame
Have you been seeing black window frames trending all over social media? I don’t know about you, but I personally think they give off such a sleek and modern look that can instantly upgrade any space!
However, I’m sure that you’re aware that the price of replacing old windows can be pretty expensive. Well what if I told you that you could achieve this black window frame look for under $50?!
In this post I will walk you though the step-by-step process on how you can DIY your own black window frame, all without having to replace any windows or spend a crazy amount of money.
The best part about this DIY is that you probably already have some of the items that you need laying around the house. Even if you don’t, the final cost of this DIY is still attainable.
Supplies Needed:
- Masking Film w/ Hand-masker Dispenser
- FrogTape
- Rust-oleum Black Spray Paint
- Small Angle Paint Brush
- 1/4 x 3/4in Moulding or Electrical Tape
- Double-sided Mounting Tape (If using moulding)
- Saw - any saw will do (If using moulding)
SHOP SUPPLIES HERE

Prep Work:
Prep work is honestly the longest part of this entire process. Before anything, make sure to clean your window to start off with a good base.
Next take the masking film and place it right along the outer edges of the window frame. I was unfortunately unaware of the hand-masker dispenser so I struggled a bit to keep the film in place while I was taping it. I highly recommend purchasing the dispenser if you want to save time and make the task easier. Unfold the film as you continue to place it along the outer edges of the window to cover as much of the surrounding area as possible.
For the inner portion of the window place the FrogTape along the inner edges. Place masking film on the remainder of the exposed portions of the window.
Be sure to cover anything in the room that you would not want to get paint on. I recommend using plastic or canvas drop cloths on the floor and on any other areas that you want to protect. In my experience the overspray wasn’t too bad but better safe than sorry.
Steps:
- Spray a coat of paint over the window frame. Try to keep the coat light to avoid any dripping. Let the paint dry and repeat this step until the frame is coated to your liking. For me it took three coats of paint to get the coverage that I wanted.
- Once the paint is dry carefully remove the masking film and FrogTape
- Examine the frame. Chances are that it isn’t 100% perfect and there may be some small areas that you need to touch up on. I found that the easiest way to do this is to spray some paint into a paper/plastic cup (or the cap of the spray can) and use a tiny angular paint brush to fix any errors.
For the grids of the window:
If the grids of your window are in between two pieces glass then you most likely won’t be able to paint them. Alternatively, you can purchase pine moulding to go over the original grids.
- Measure window grids and cut moulding to size. We used our table saw to trim the moulding, but any saw will do.
- Spray paint the moulding pieces black
- Apply mounting tape onto the back of each moulding piece
- Place the moulding on the the window directly above where the window grid sits underneath.
- If your cuts aren’t perfect (mines were a tad bit too short), you can fill in any gaps using paintable caulk. Use a small angular brush to go over the caulk with black paint.
If moulding is not an option for you, you can also use black electrical tape to go over your original window grids. However, I found that the moulding looks more professional and holds better.
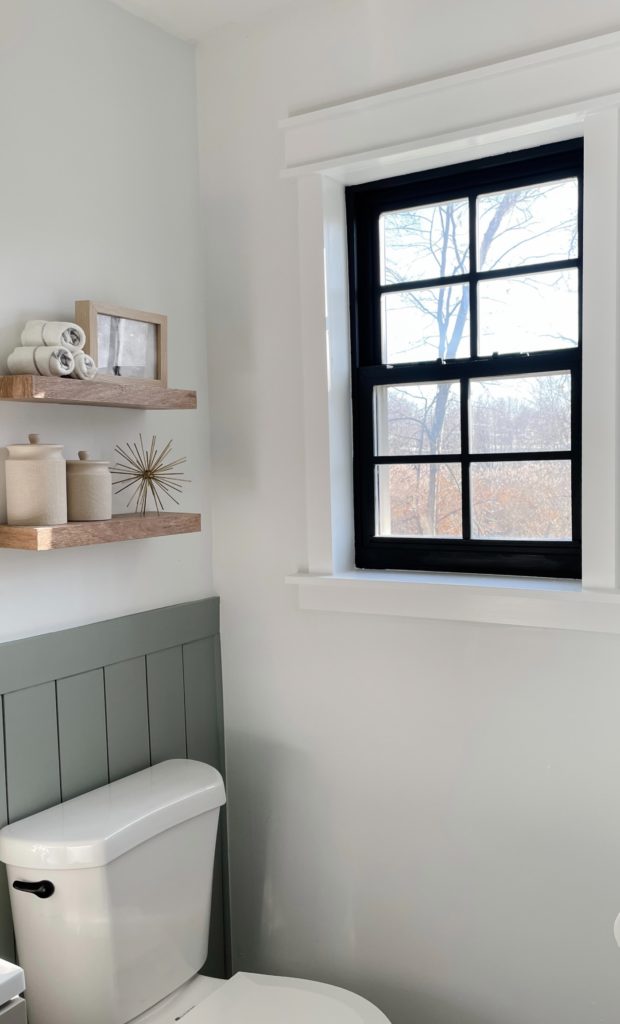
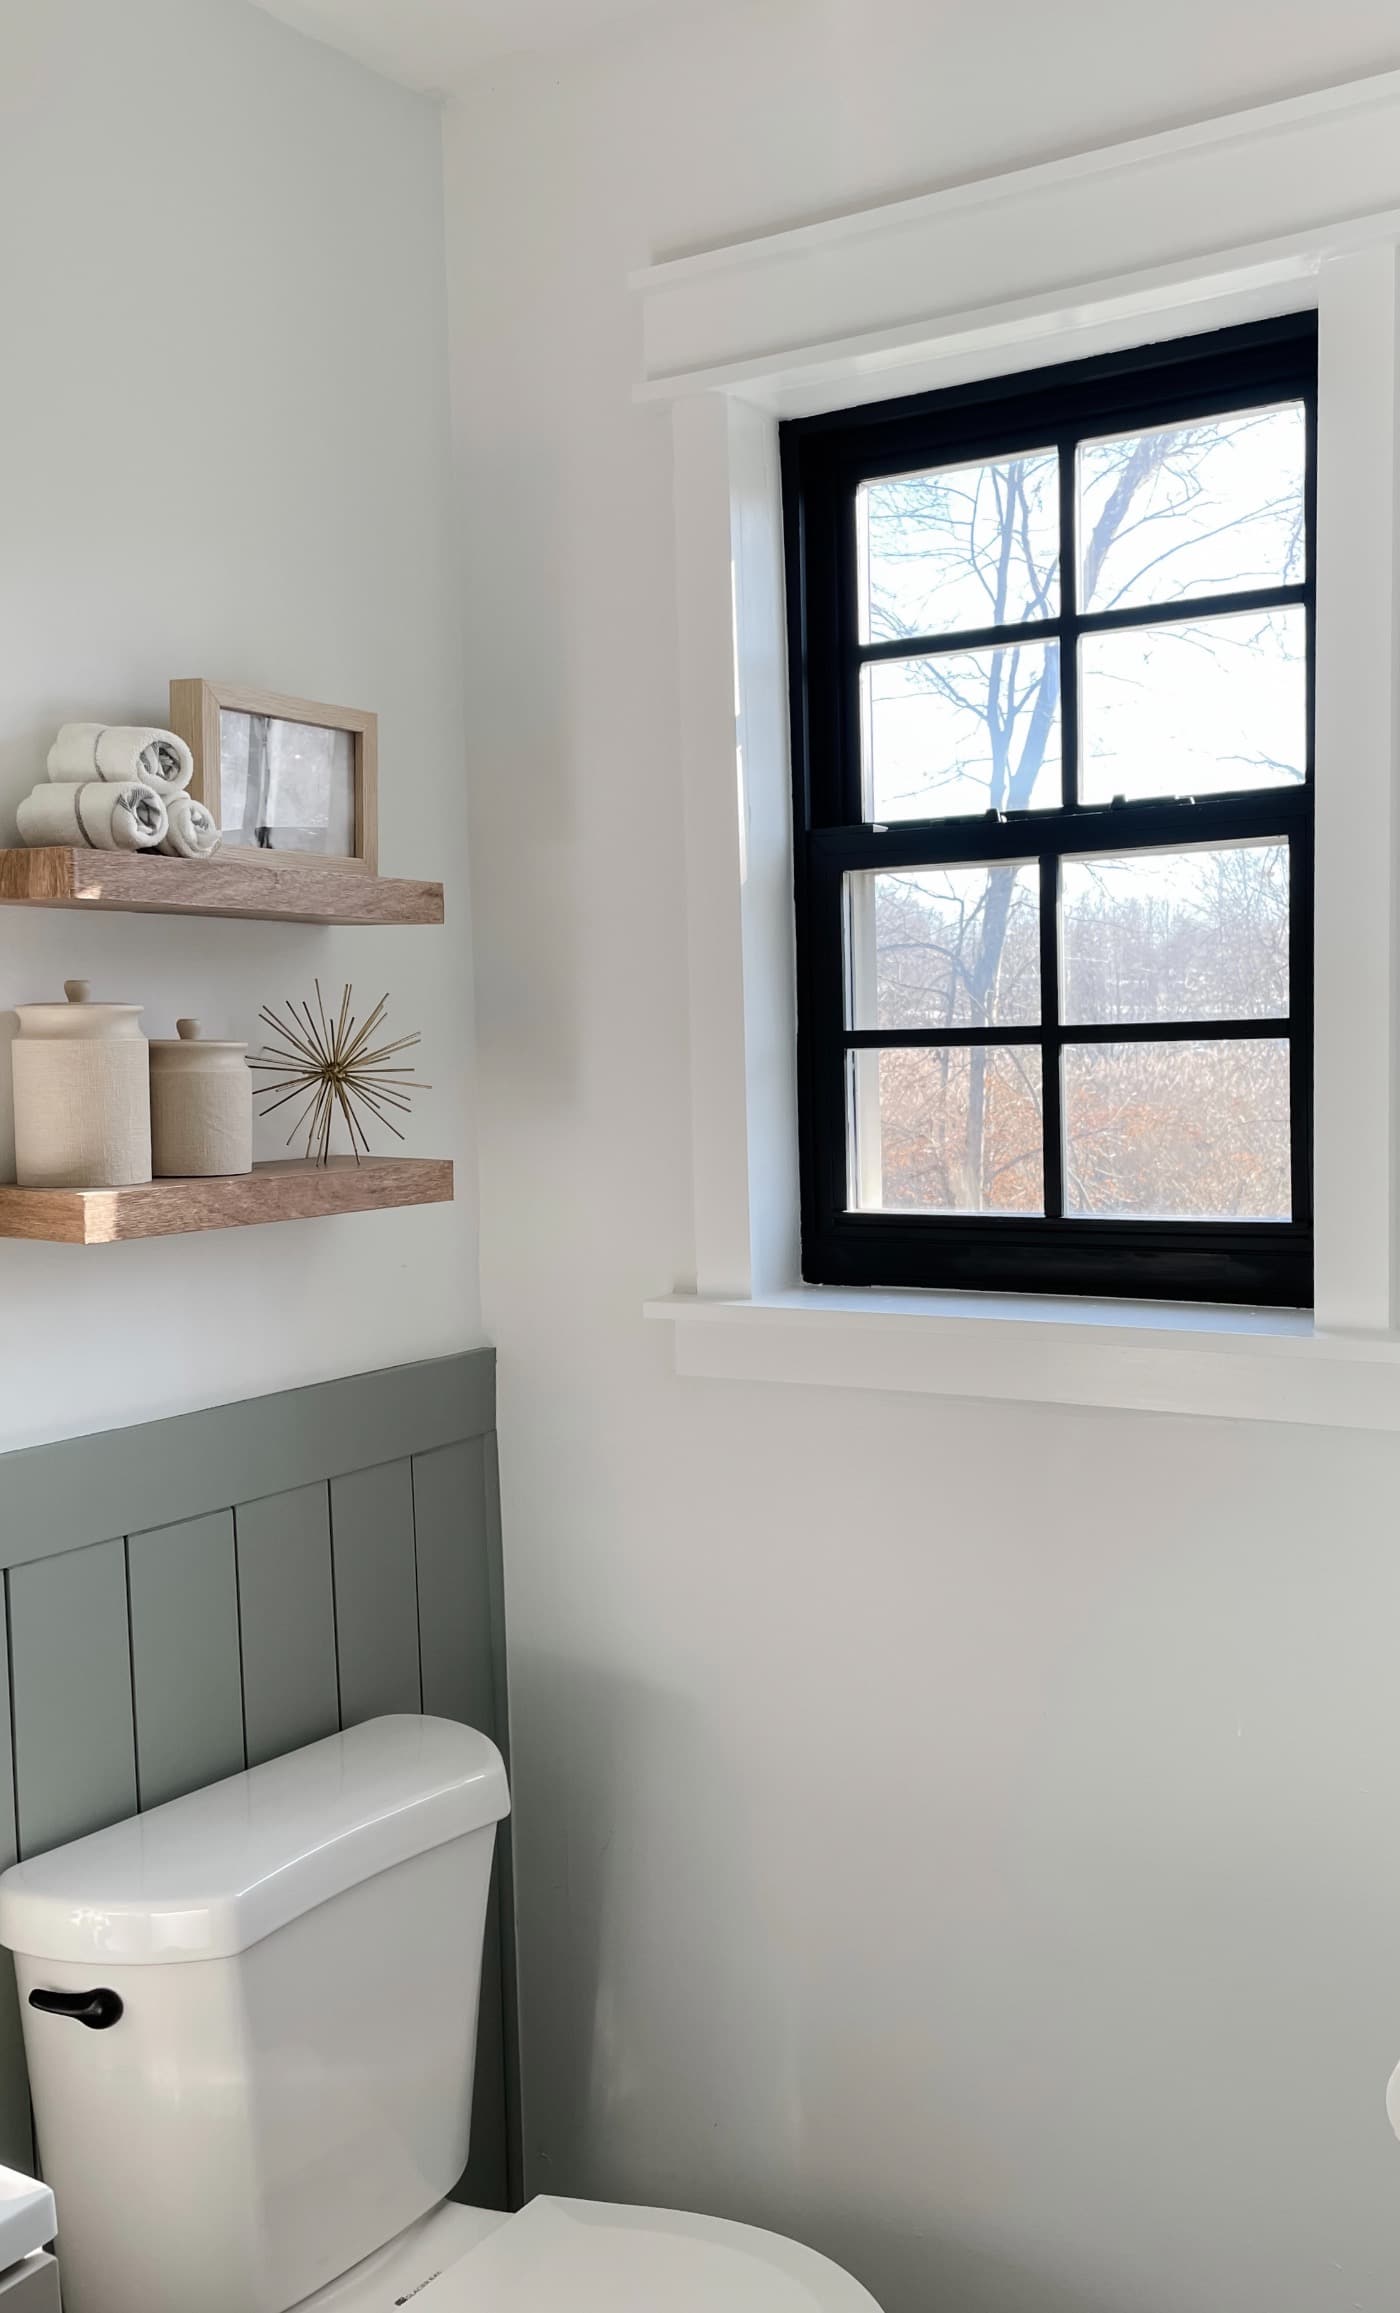
There you have it! Black window frames in just a few hours. Although it may sound silly to some this simple change made a big difference in the overall appearance of our bathroom!
Feel free to leave any questions down below. If you would like to see this project in action I have some video clips on my Instagram saved to a highlight titled “Black Window Frame”. As always if you try this project feel free to tag @ourblissfulnest on your Instagram post or send me a picture via email or DM. I would love to see how it turns out!
Disclaimer: This post contains links in which I do earn a small commission from if you decide to purchase through them. This comes at no additional cost to you and as always your support is greatly appreciated!
The Comments
Marycela
Hello! Love Your blog and was wondering what color you painted the slats behind the toilet?
Thank you!
Erika
> MarycelaHi, thanks so much! The color of the shiplap is “Oil Cloth” by Benjamin Moore
Sandy
How does the paint hold up when you open the window?
Erika
> SandyThis window has never had a screen behind it so we don’t really ever open it. Sorry, wish I had a better answer!