If you landed on this article my guess would be that you’ve either never painted a room before or you have and you hate the process of doing so. By no means am I a professional painter, but I have done my fair share of painting over the past few years. Here are the best 5 tips and tricks that I have found to make painting your interior walls a much easier and enjoyable task!
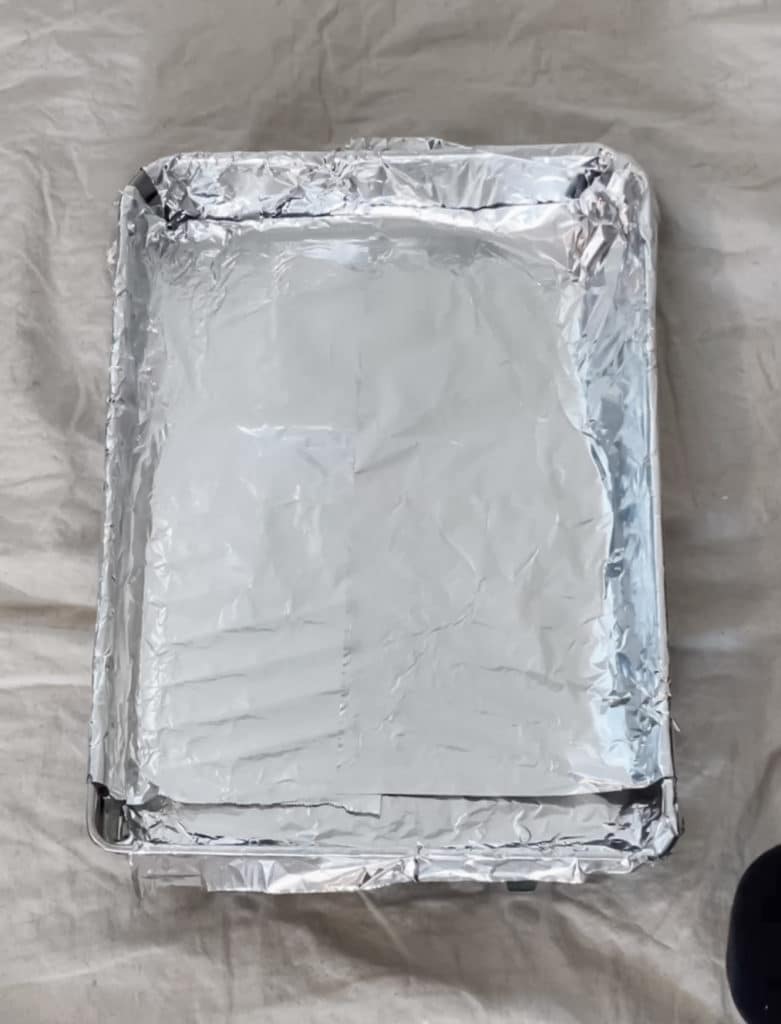
1. Line your painting tray with aluminum foil
Not only will lining your tray with aluminum foil make for a much easier cleanup, but it will also allow you to use your paint tray more than once! I recommend using 2-3 layers of aluminum foil to prevent any paint from seeping through. When you are finished painting simply throw away the aluminum foil and your tray is ready to go for next time!
2. Make pouring easier
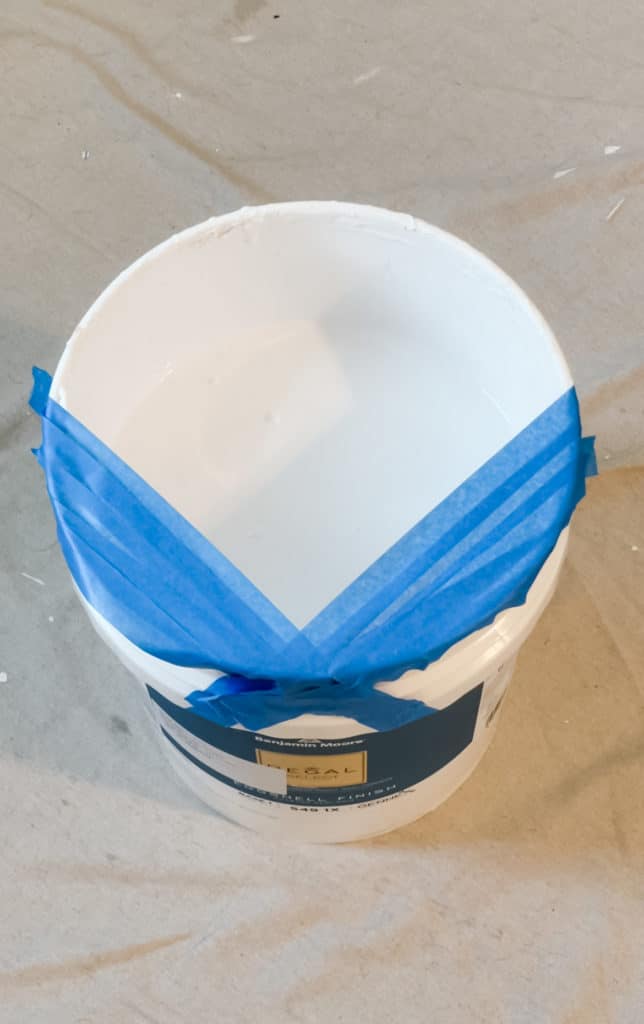
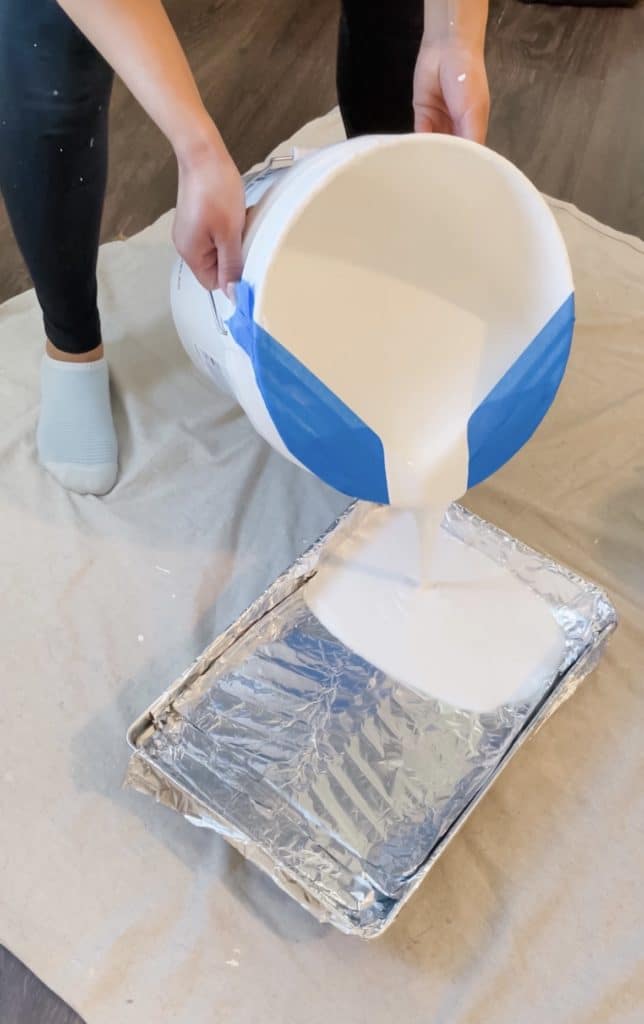
I don’t know about you but I am always so messy when it comes to pouring paint into my tray- especially if I’m dealing with a 5 gallon bucket.
Luckily this tape trick has done wonders for me! Roll your painter’s tape diagonally beginning at the midpoint on the left side of the diameter of the can and finishing at the bottom midpoint of the diameter of the can. Repeat on the other side by rolling the tape from the right midpoint diagonally down to the bottom midpoint. When you are finished you should have a “V” shape appearance on the bottom half of your can.
This makes pouring your paint so much easier. It is more controlled and better contained. Wipe the excess off with a paper towel before it begins to drip.
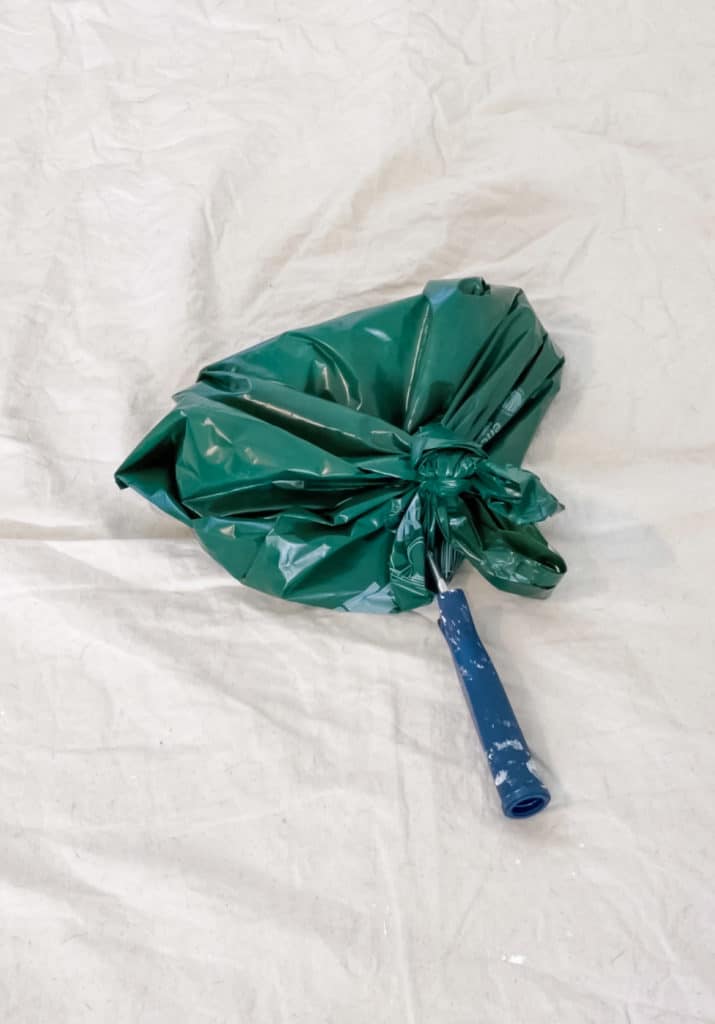
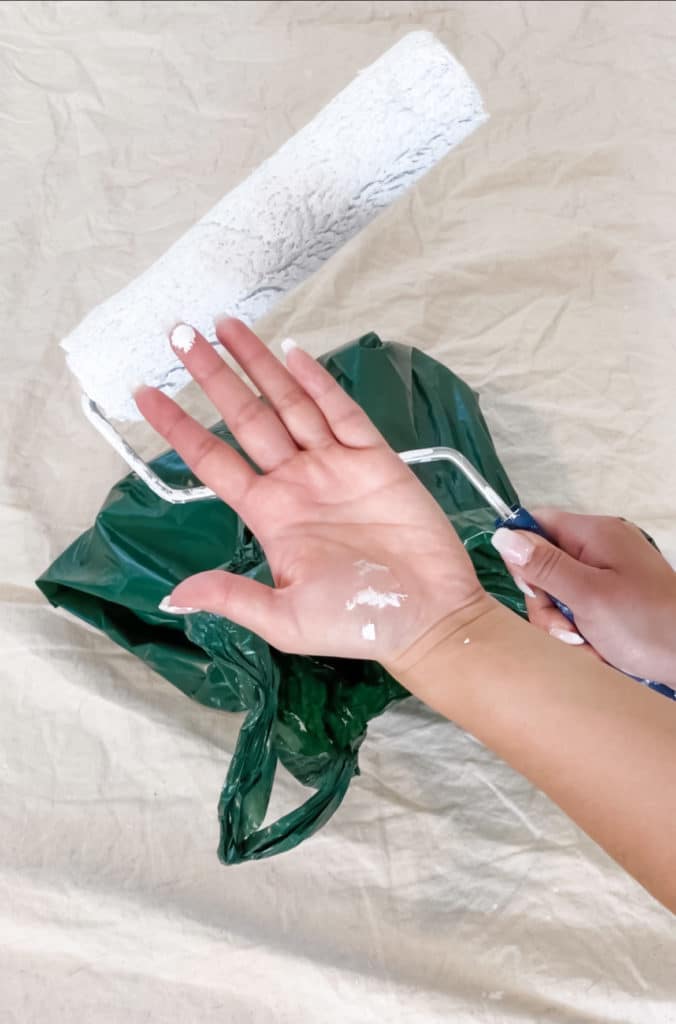
3. Store paint brushes & rollers in plastic bags
If you decide to take a break from painting make sure to store your paint brushes/rollers in plastic bags. Seal your plastic bags tightly so that there is minimal air flow. This will prevent your brushes/rollers from drying out. This trick also works perfectly overnight if you are done painting for the day but plan to continue the next day.
This roller was left in a plastic bag overnight. As you can see by the paint on my fingertip it has not dried out.
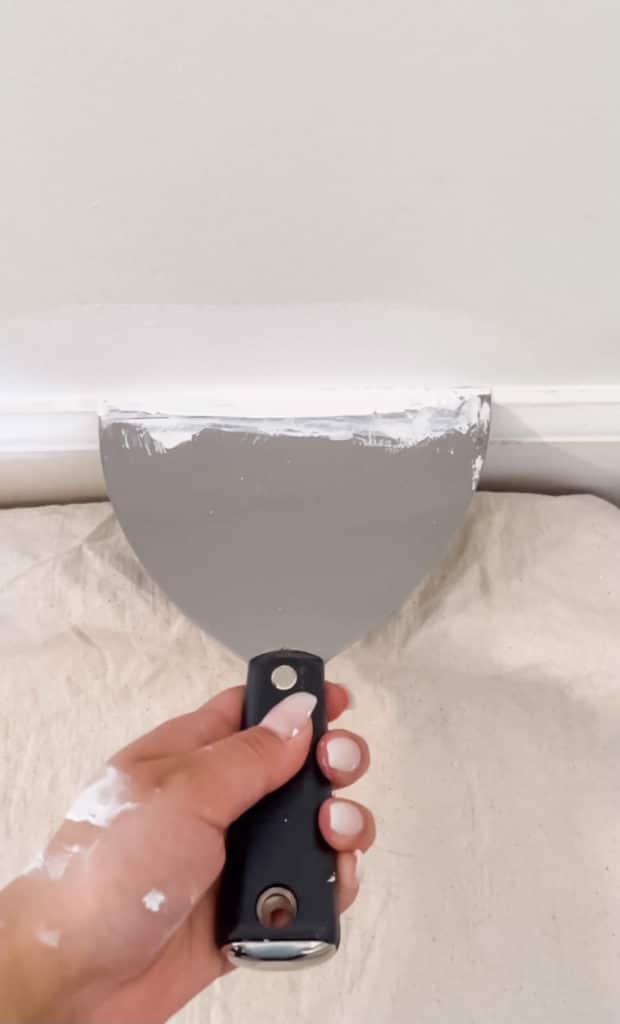
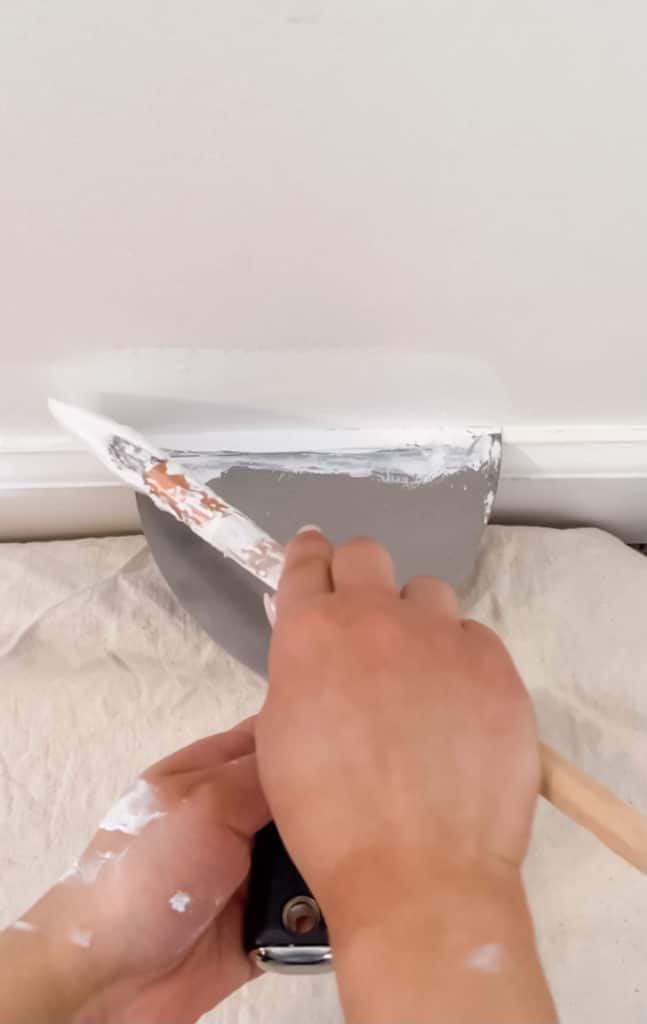
4. Use a putty knife to create clean edges
Do yourself a favor and save time by skipping out on the painters tape. You can still achieve clean and crisp edges without going through the tedious step of taping along all across your wall. Instead, use a putty knife and place it alongside your edge to avoid getting paint on the ceiling, trim, adjacent wall, etc.
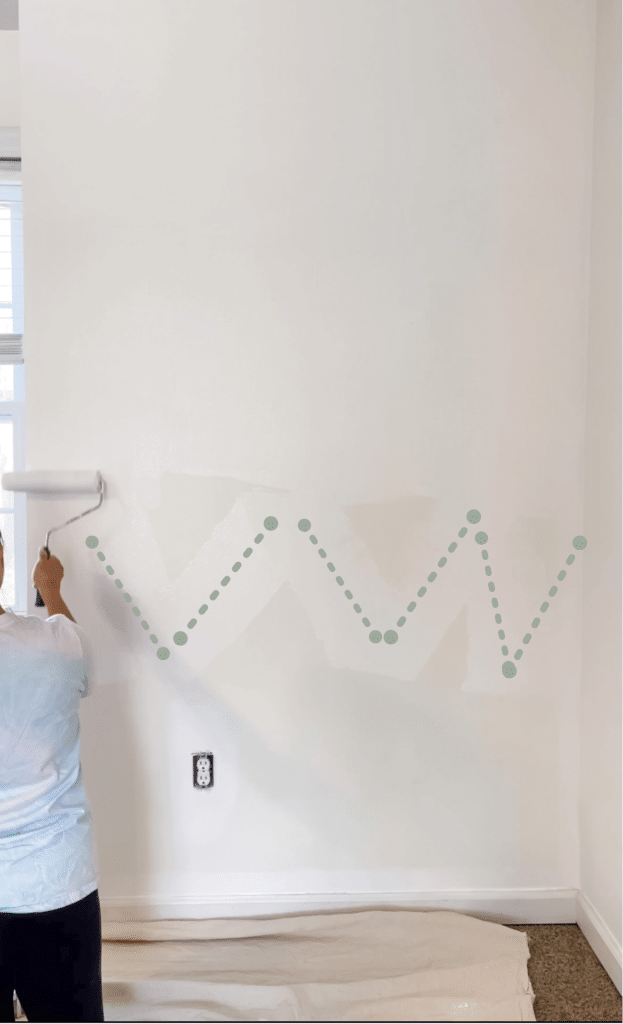
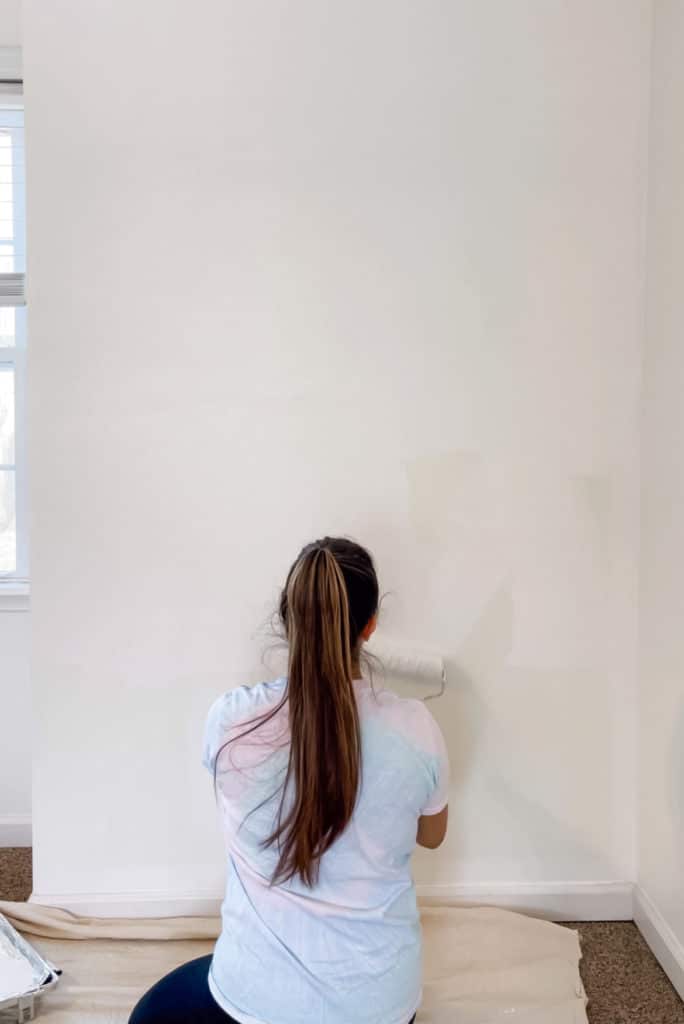
5. Apply first coat of paint in a "W" pattern
When applying your first coat of paint create a “w” pattern to spread the paint evenly across the wall. The second time around roll the paint to completely cover the entire area.
First coat of paint
Second coat paint
Painting used to be dreadful task for me. However, after getting the hang of it and applying these tips and tricks it has become a much more enjoyable experience. I find myself finishing the job quicker all while barely creating a mess! I hope you find these tips helpful as well.
For more DIY tips and tricks follow @ourblissfulnest on Instagram. Leave any questions that you may have down below and I will be sure to get back to you. Happy paining!